HandFit: Automated Prosthetic Fitting

Open-Source Patient Adaptation for 3D Printed Hands

1ZHAW School of Engineering - Center for Artificial Intelligence
2ZHAW School of Engineering - IPP Institute of Product Development and Production Technologies

Abstract

Open-source 3D-printed prosthetics have made low-cost devices possible, but a critical bottleneck remains: fitting a generic design to a child's unique anatomy still requires CAD expertise and hours of manual work. For families who need to refit every 6–12 months as children grow, this technical barrier puts truly personalized prosthetics out of reach.

We present HandFit, a free Blender add-on that automates the entire customization workflow. Our framework consists of: (1) landmark-based alignment that orients the prosthetic to the patient's scan; (2) anisotropic scaling that independently adjusts wrist width and palm length; (3) socket conformation using shrinkwrap projection with millimeter-precise offset control for liner fit.

HandFit achieves sub-millimeter precision (±0.01mm) across all eight Kinetic Hand variants, reducing fitting time from 30–60 minutes to under 5 minutes. We release the add-on, pre-configured Master Models, and documentation to enable non-technical users, parents, clinicians, and makers to produce print-ready prosthetics independently.

Automated Workflow Steps


Landmark Alignment

1. Landmark Alignment

Anisotropic Scaling

2. Anisotropic Scaling

Socket Fitting

3. Socket Fitting

Final Export

4. STL Export

Getting Started

From scan to print in 5 steps

Step Action Time
1 
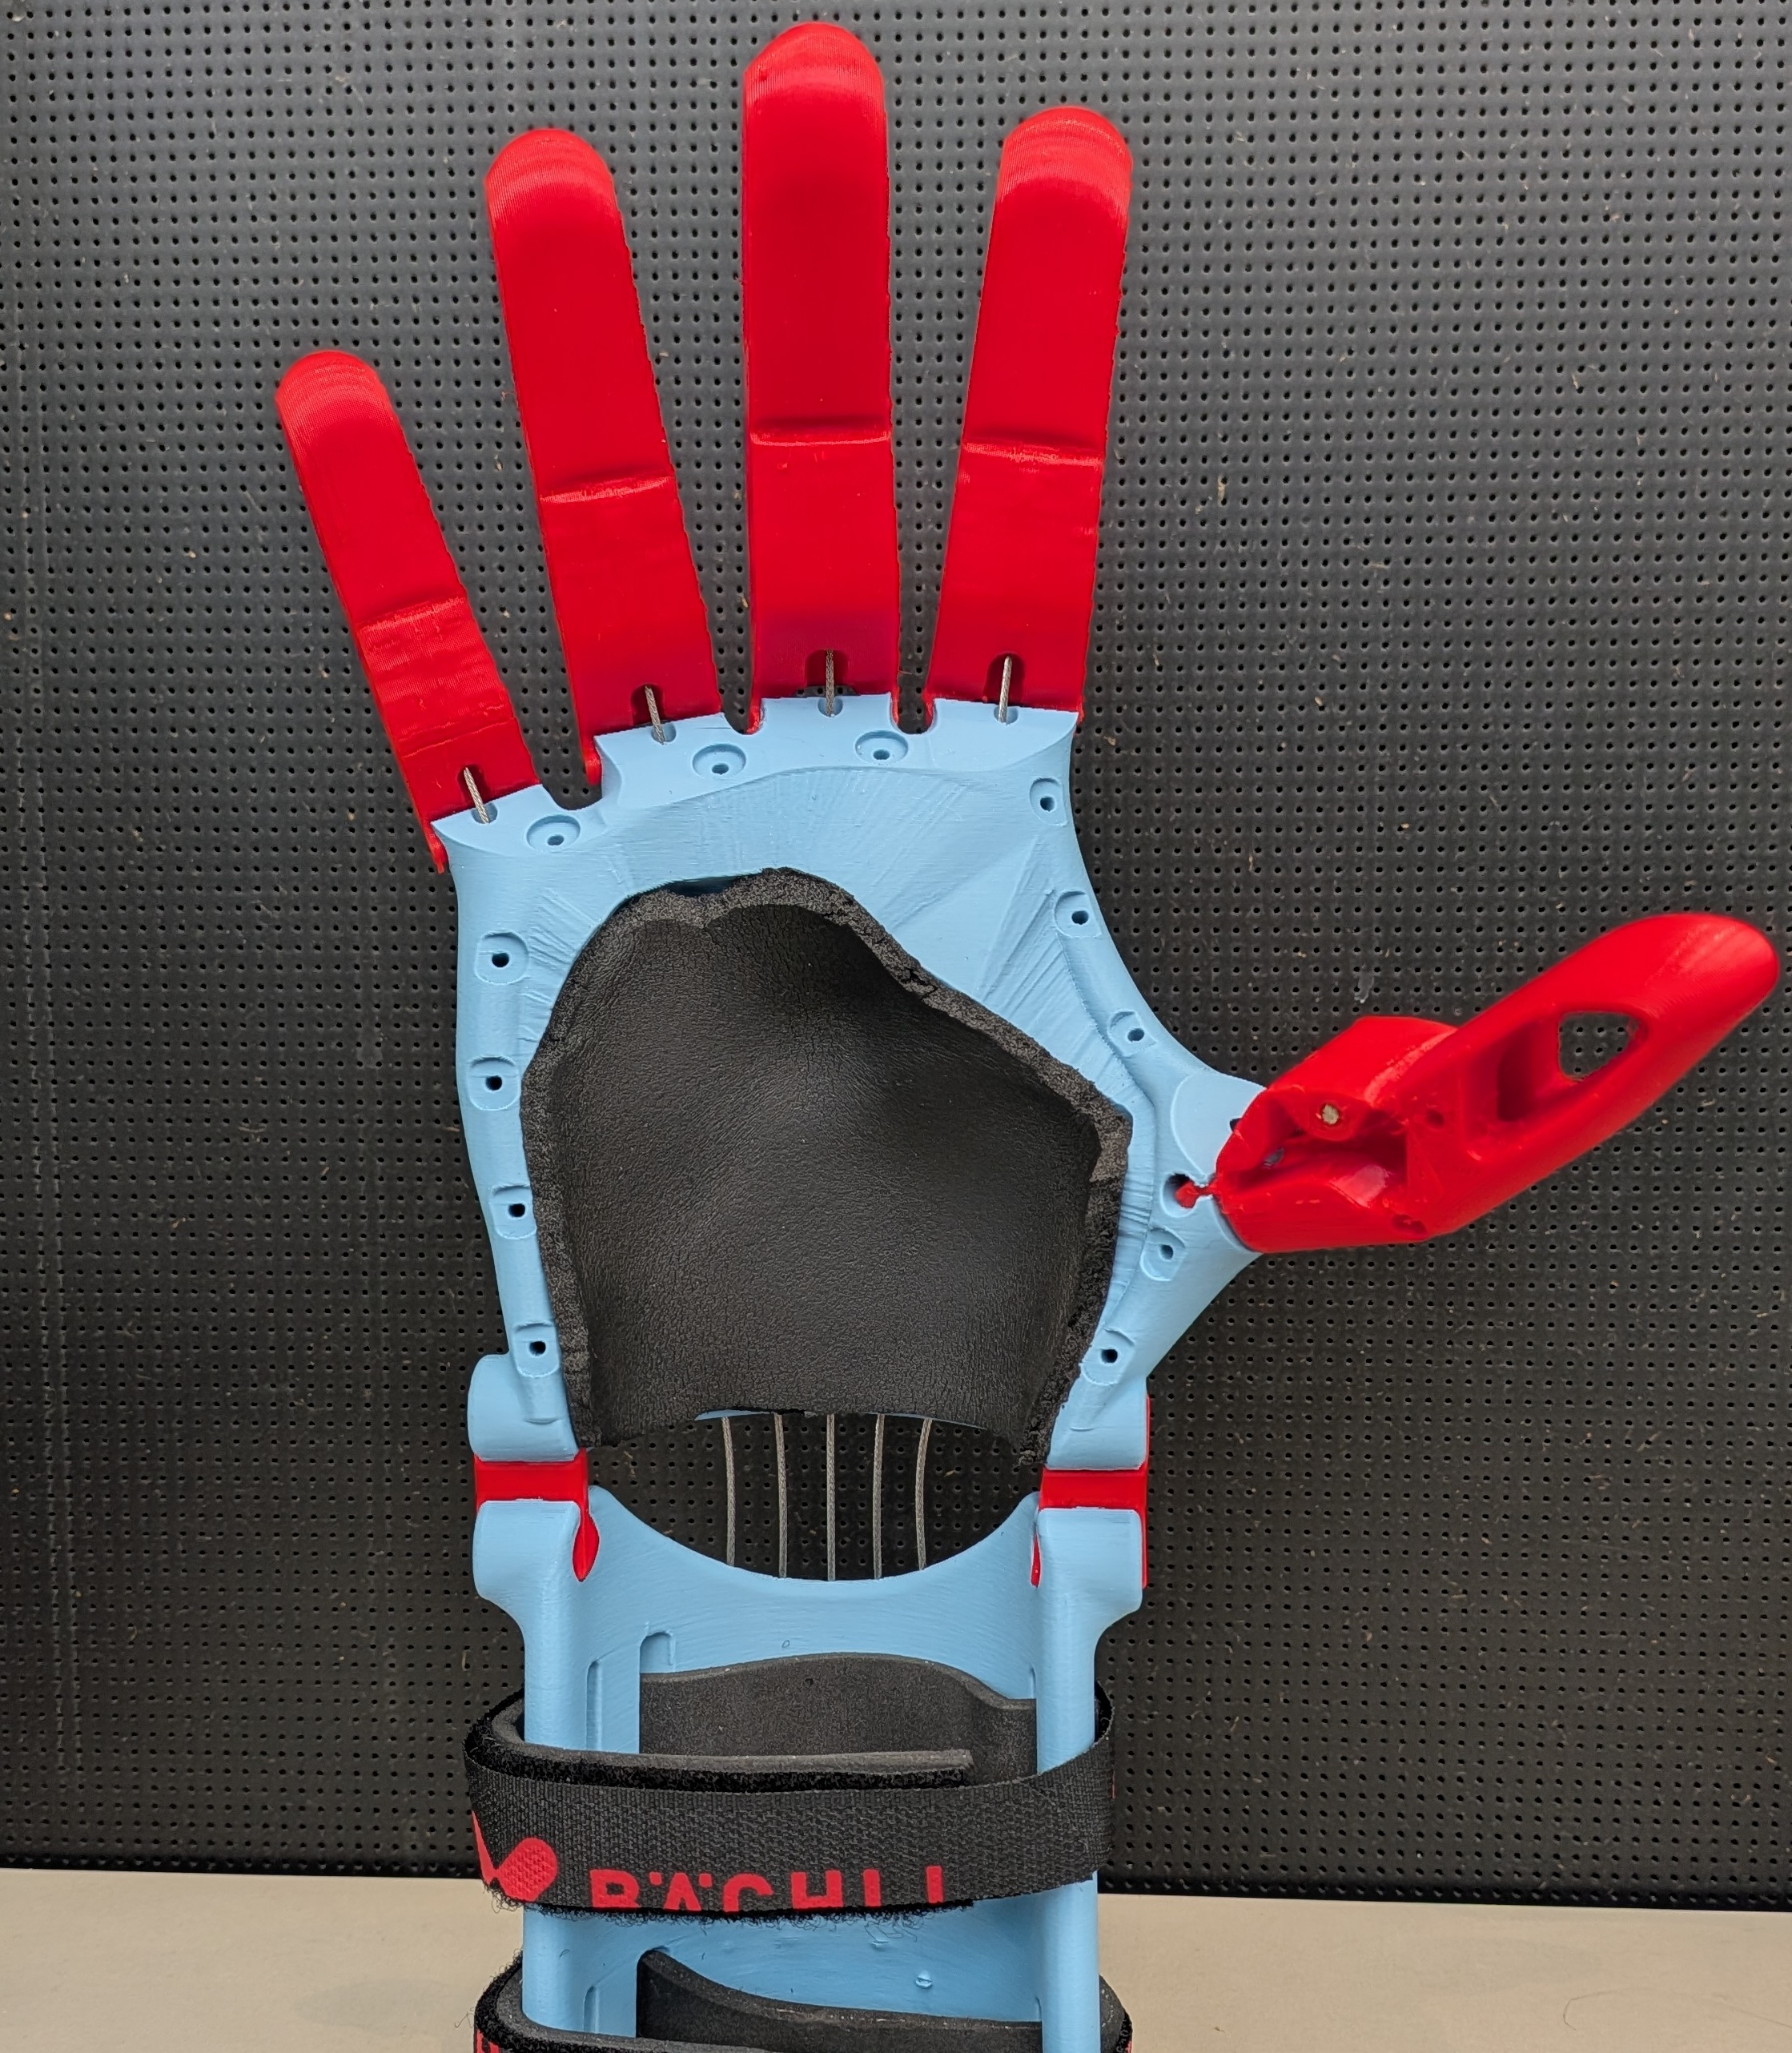
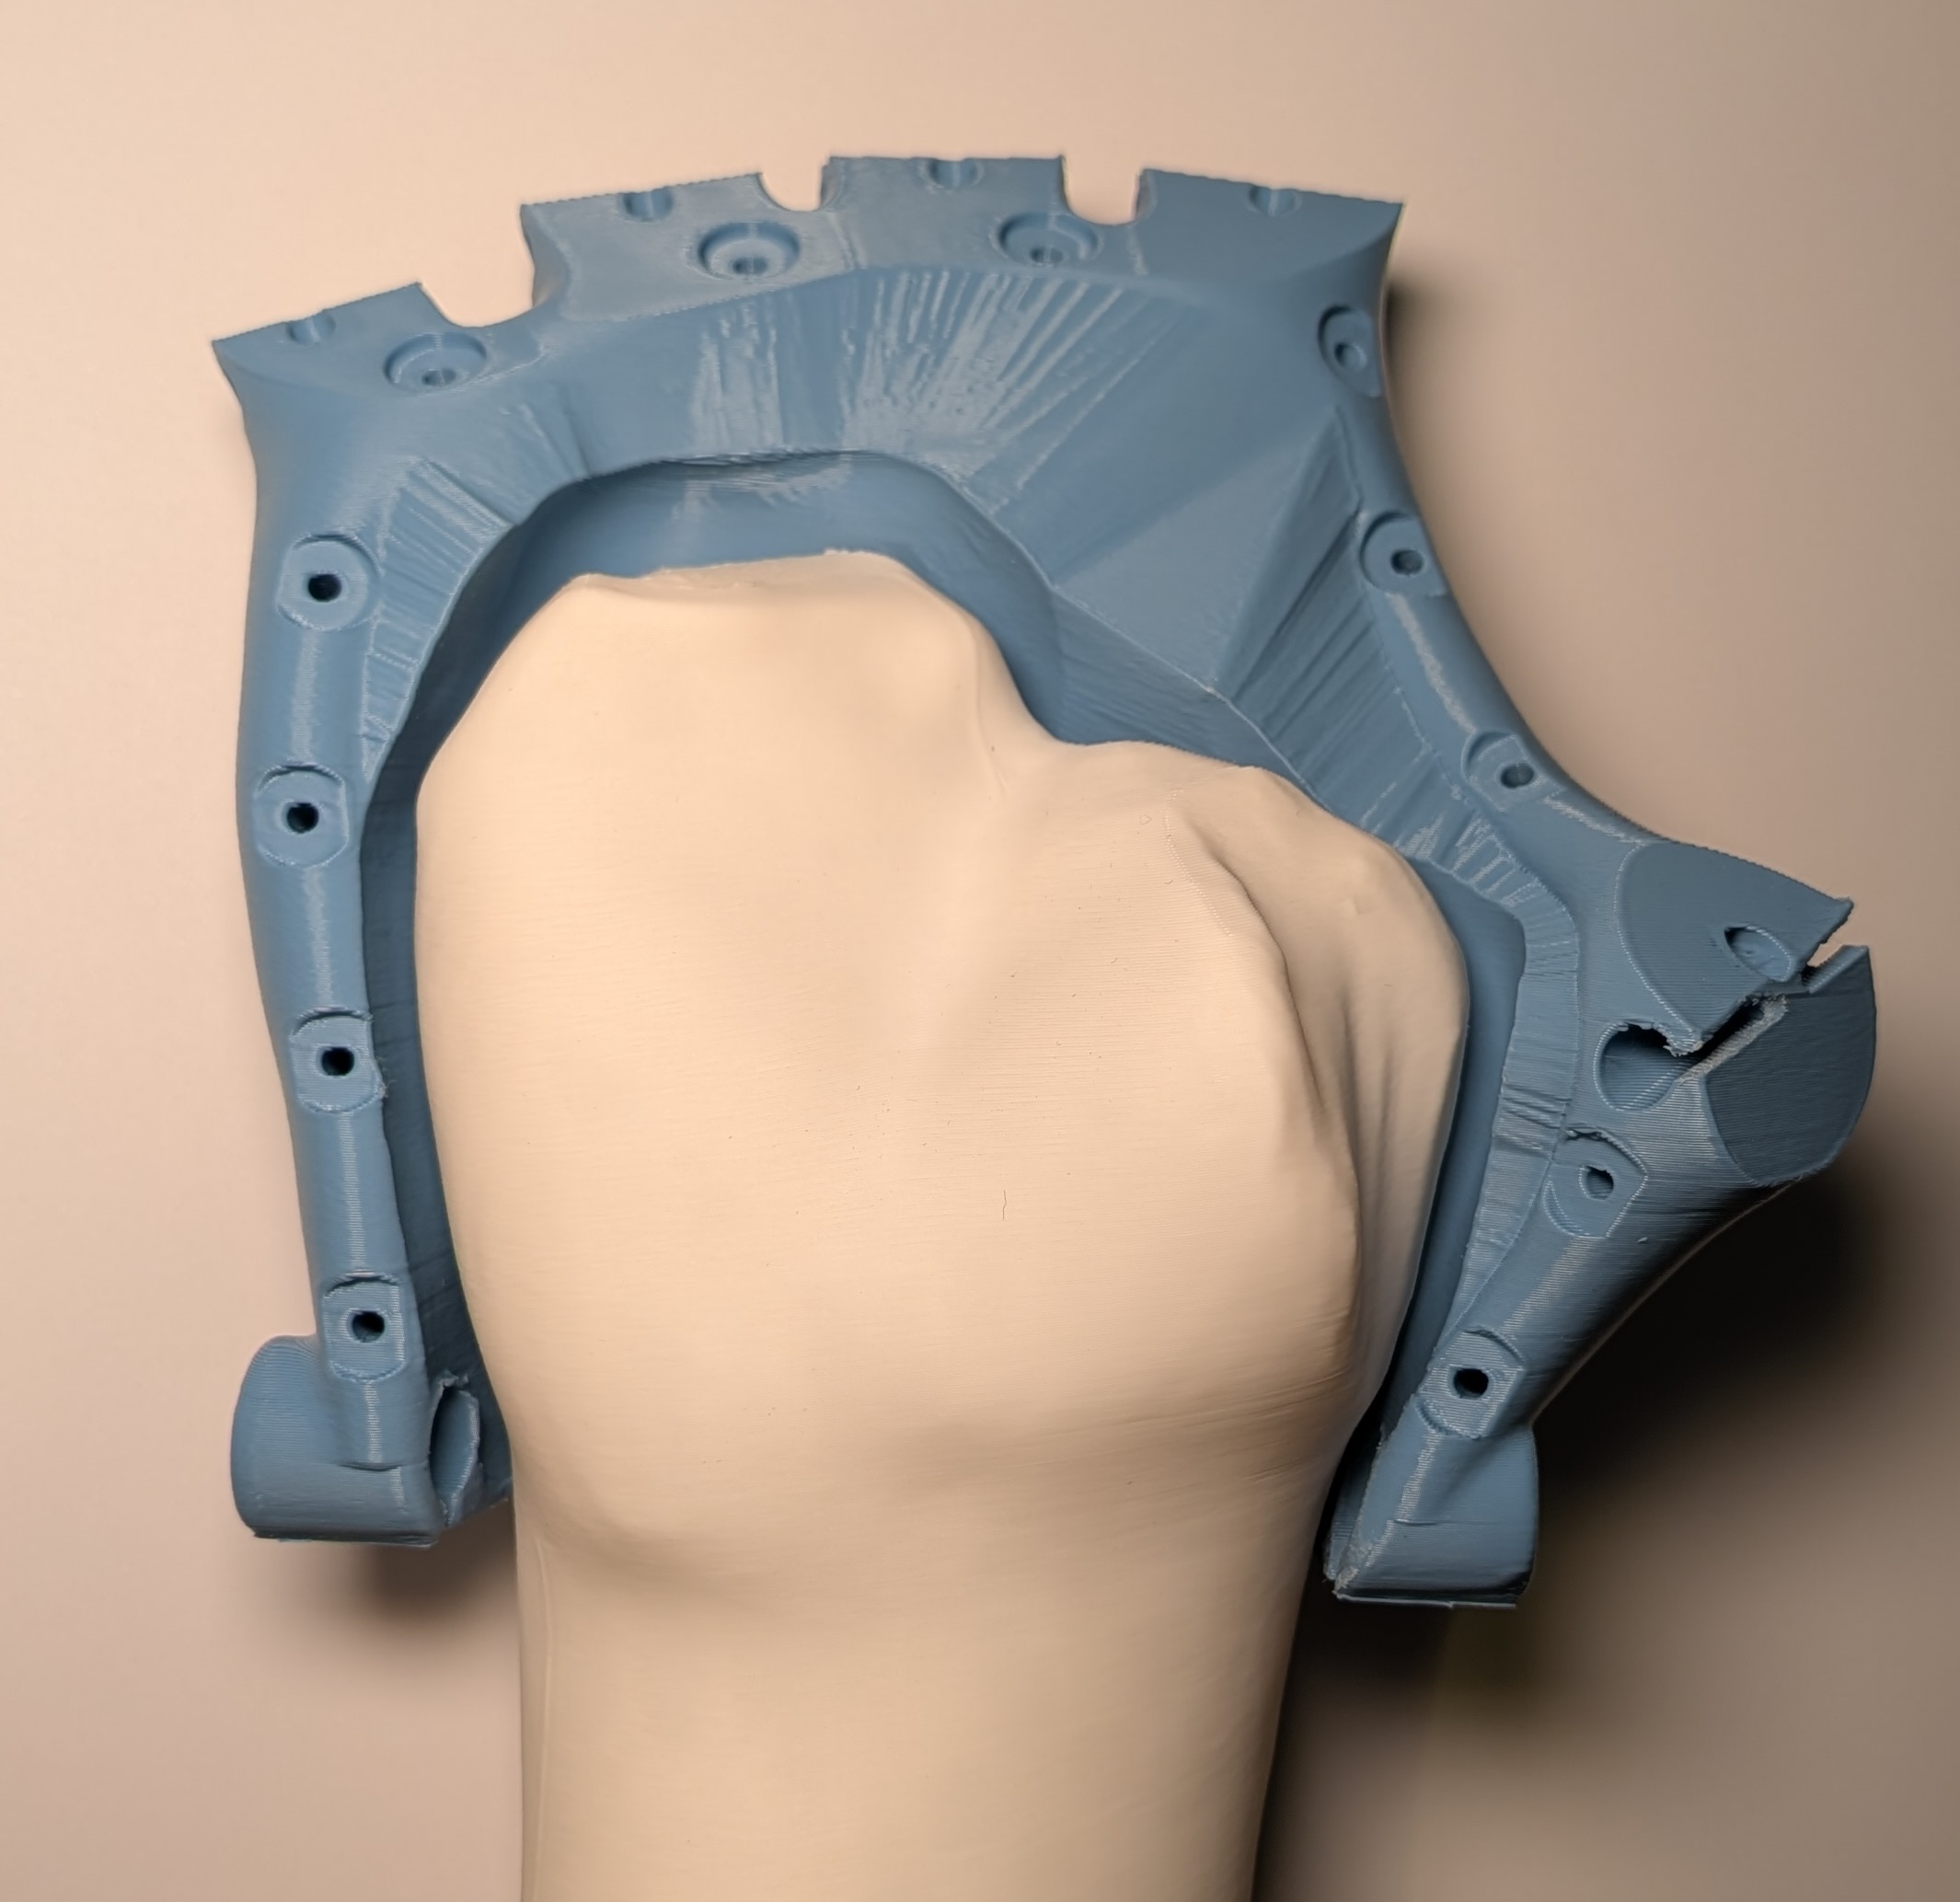
Scan the hand
Use EM3D (or similar) to capture a 360° scan of the residual limb. Export as .stl file.
2–3 min
2 
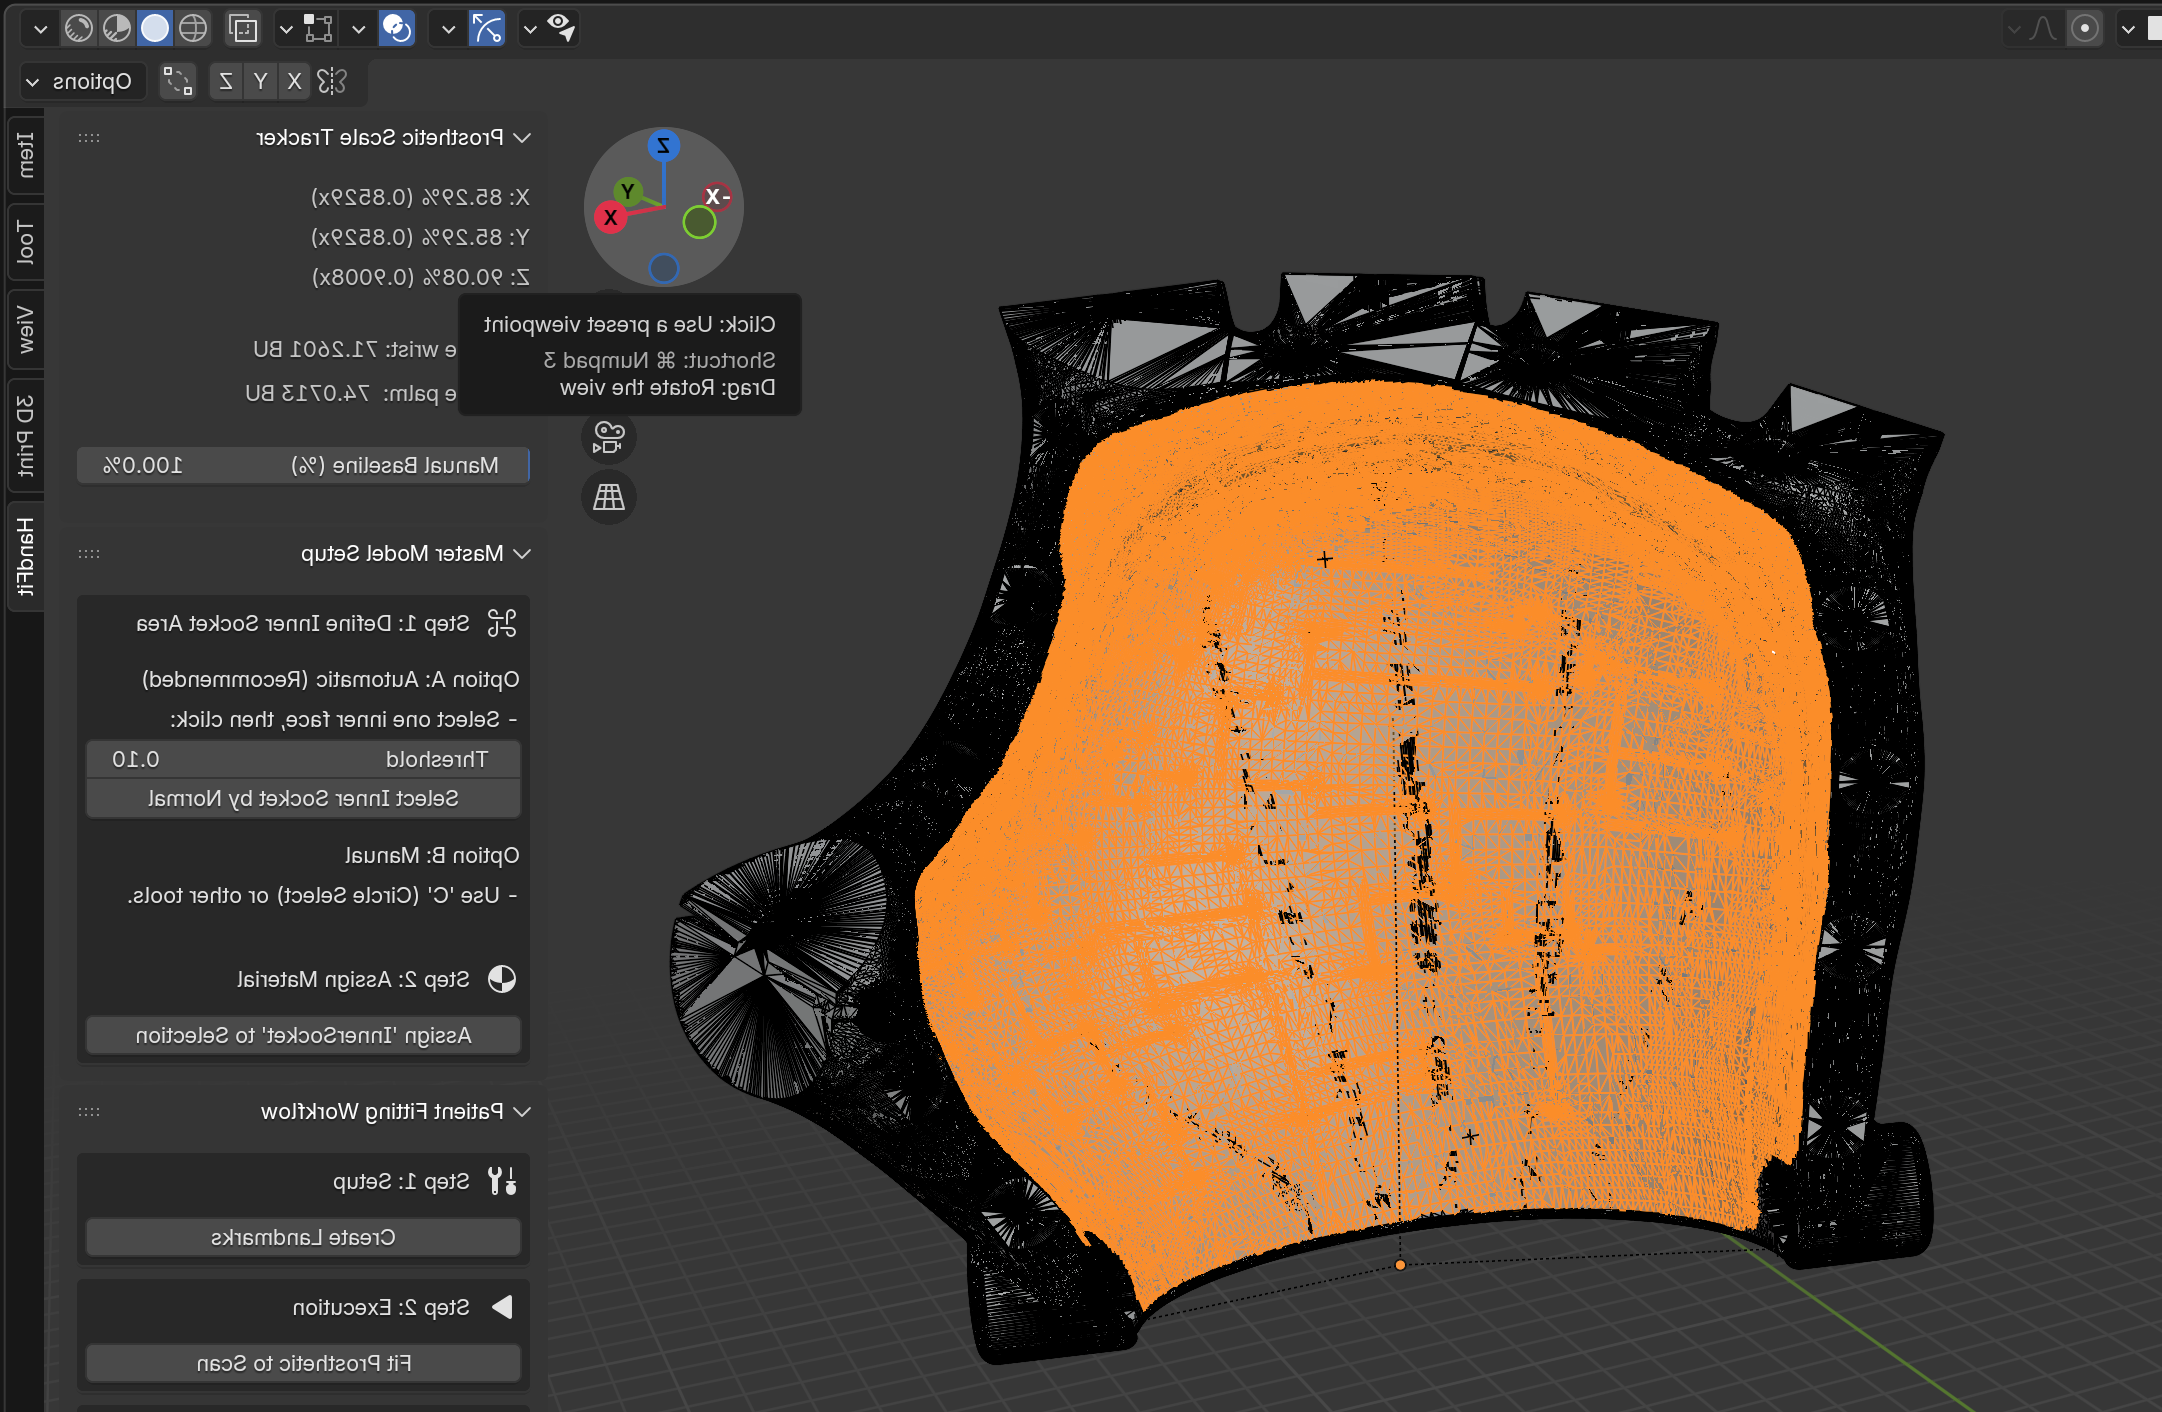
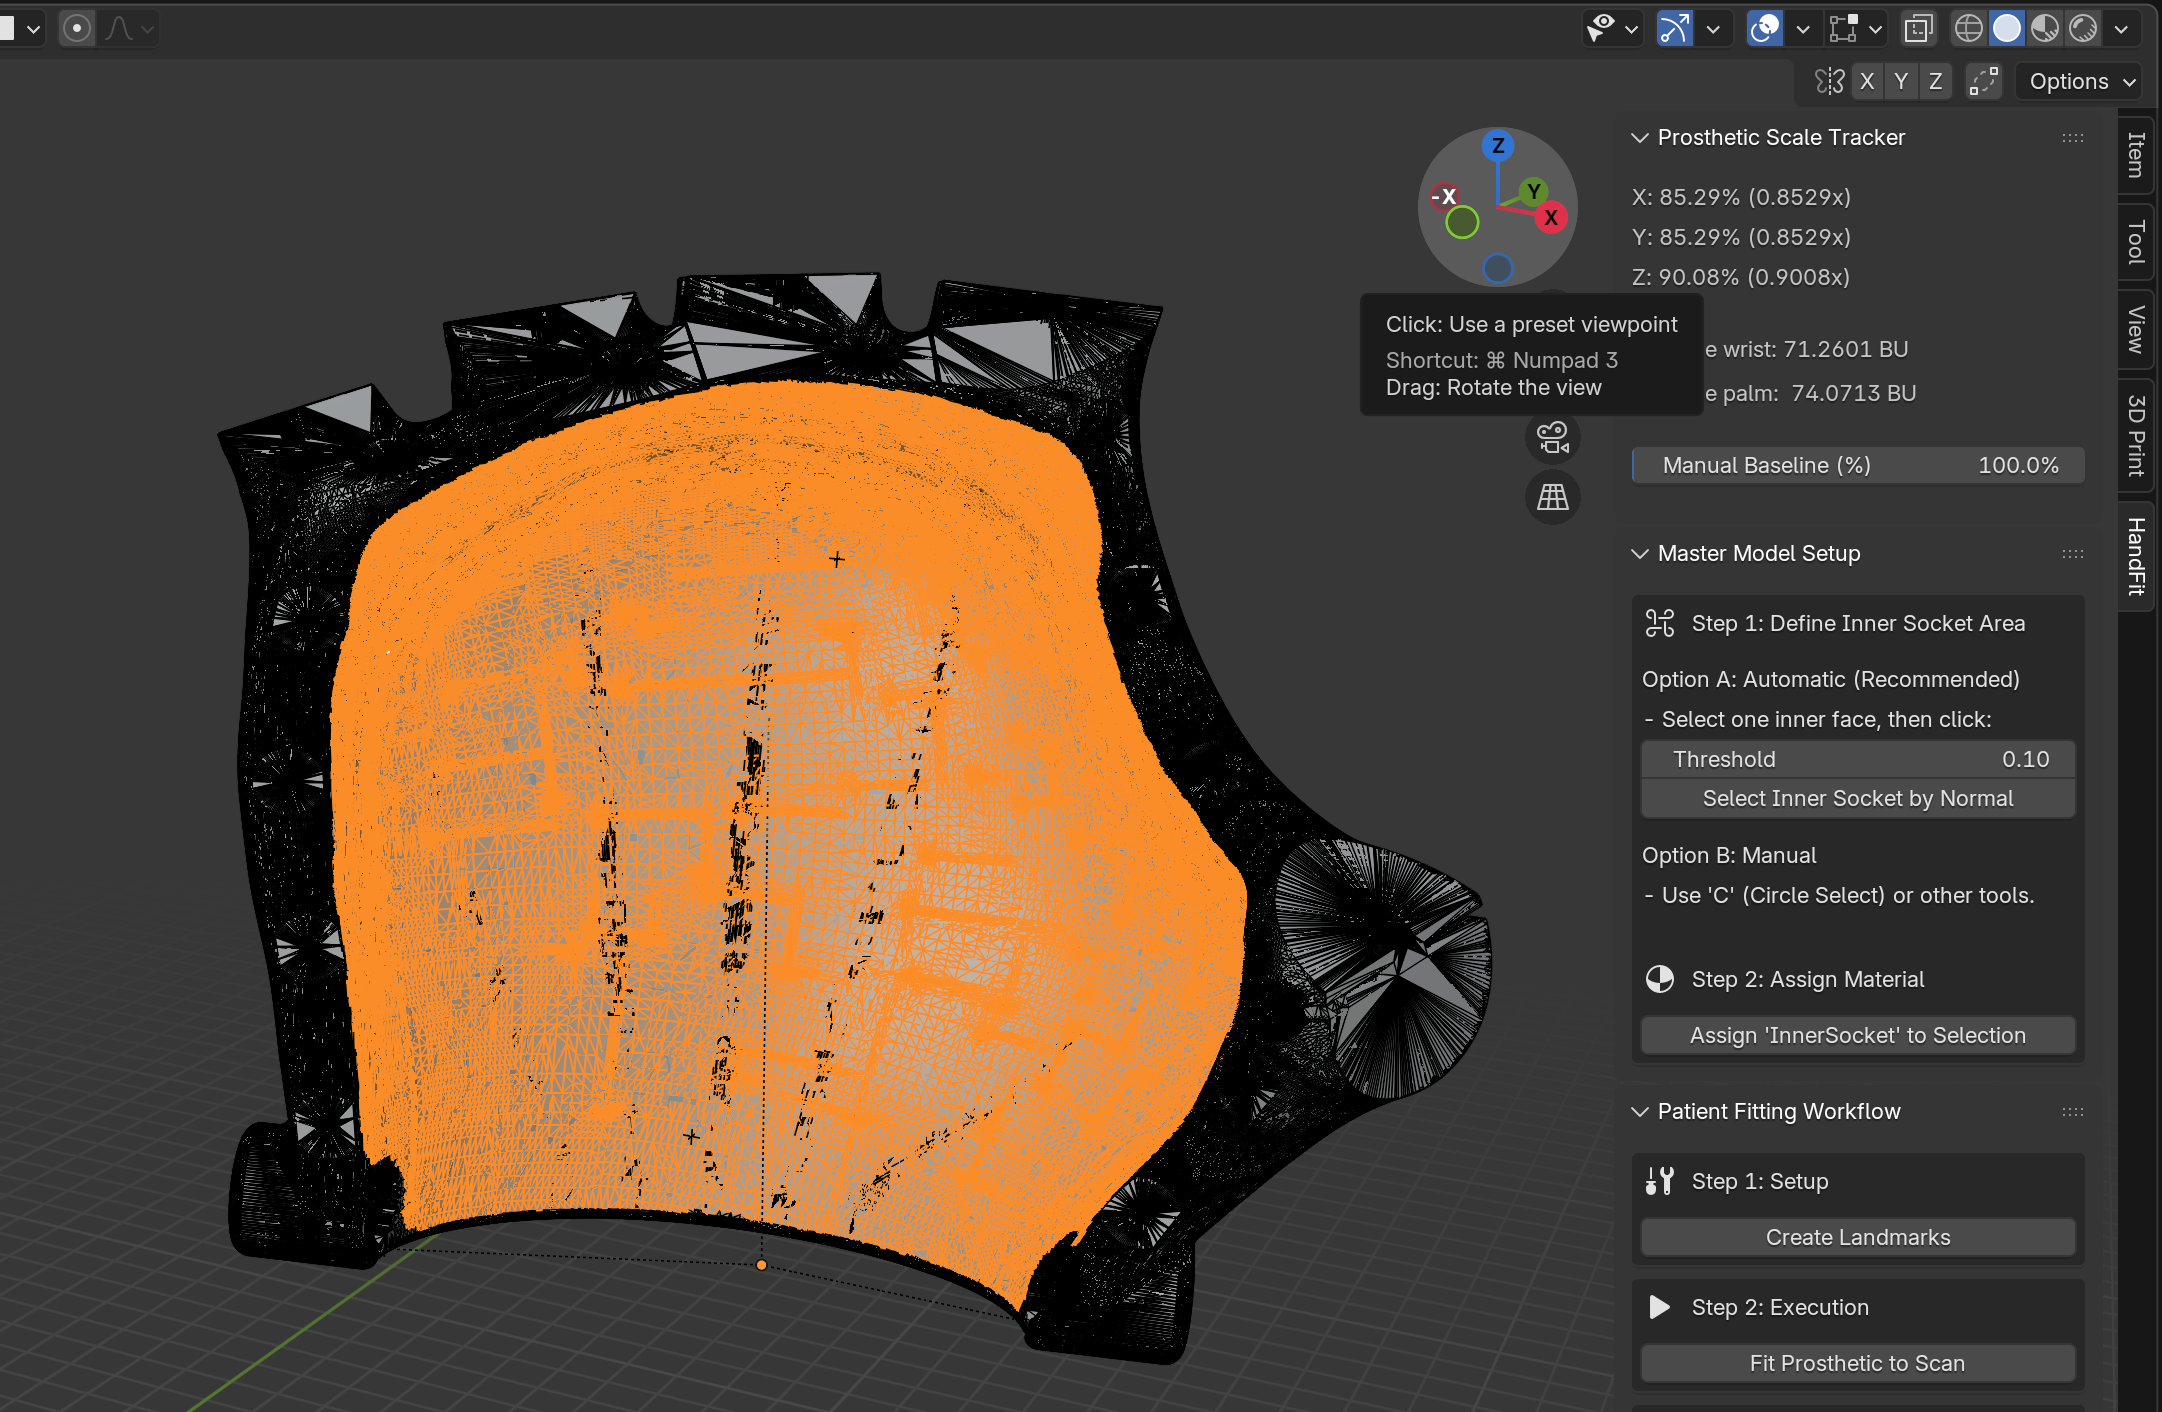
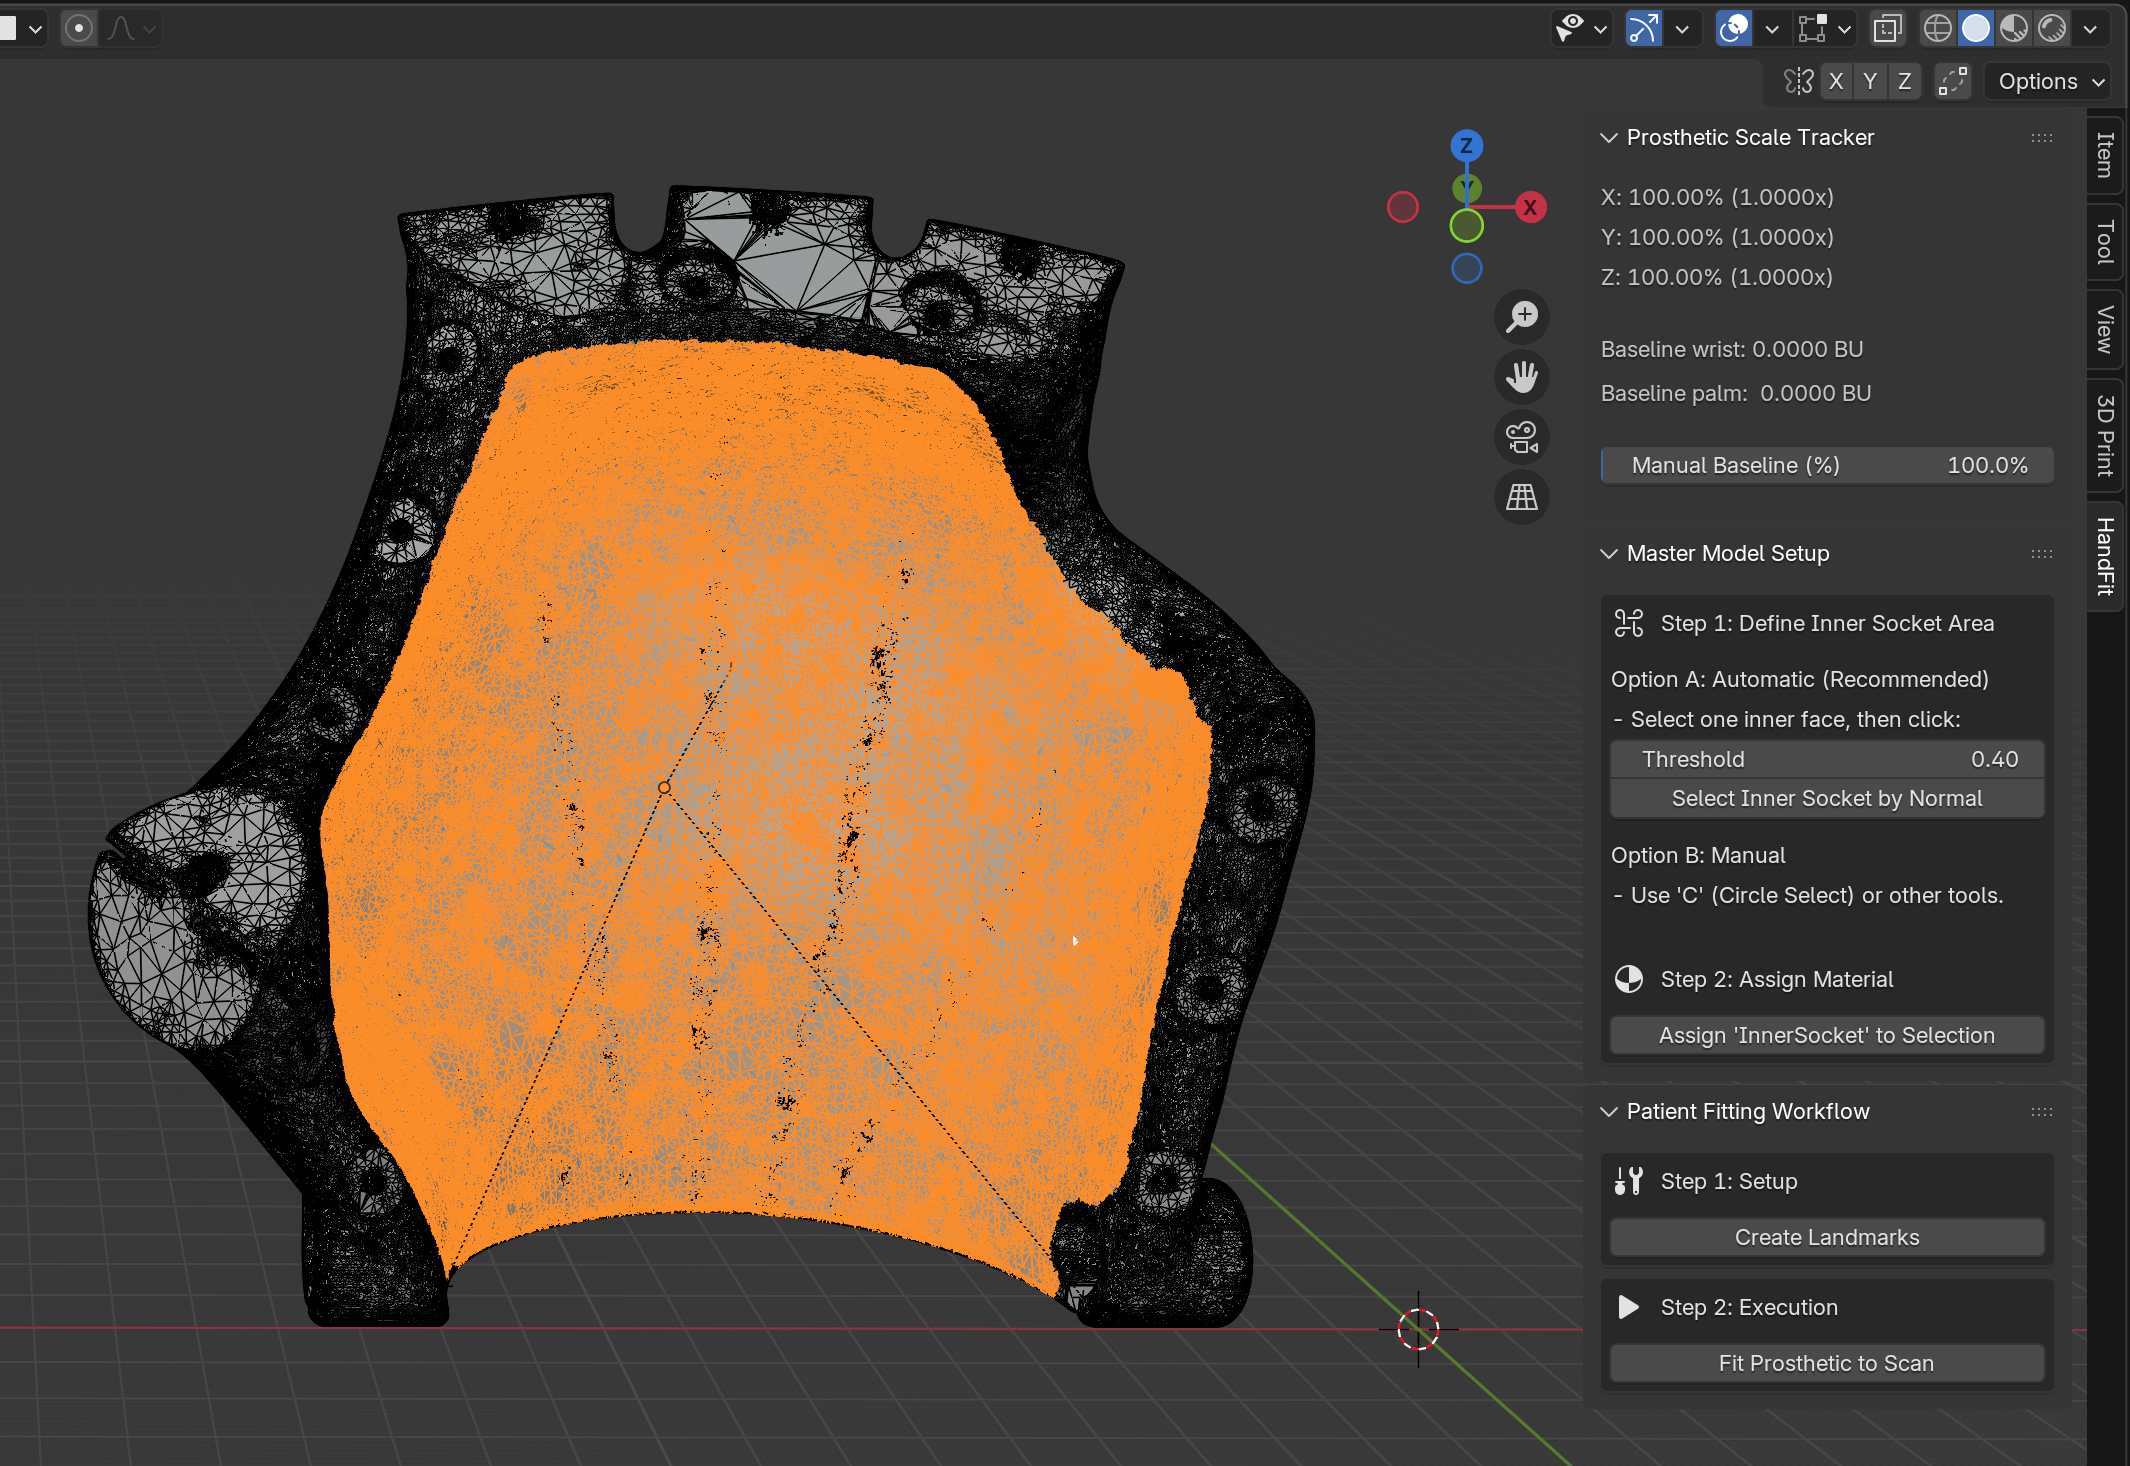
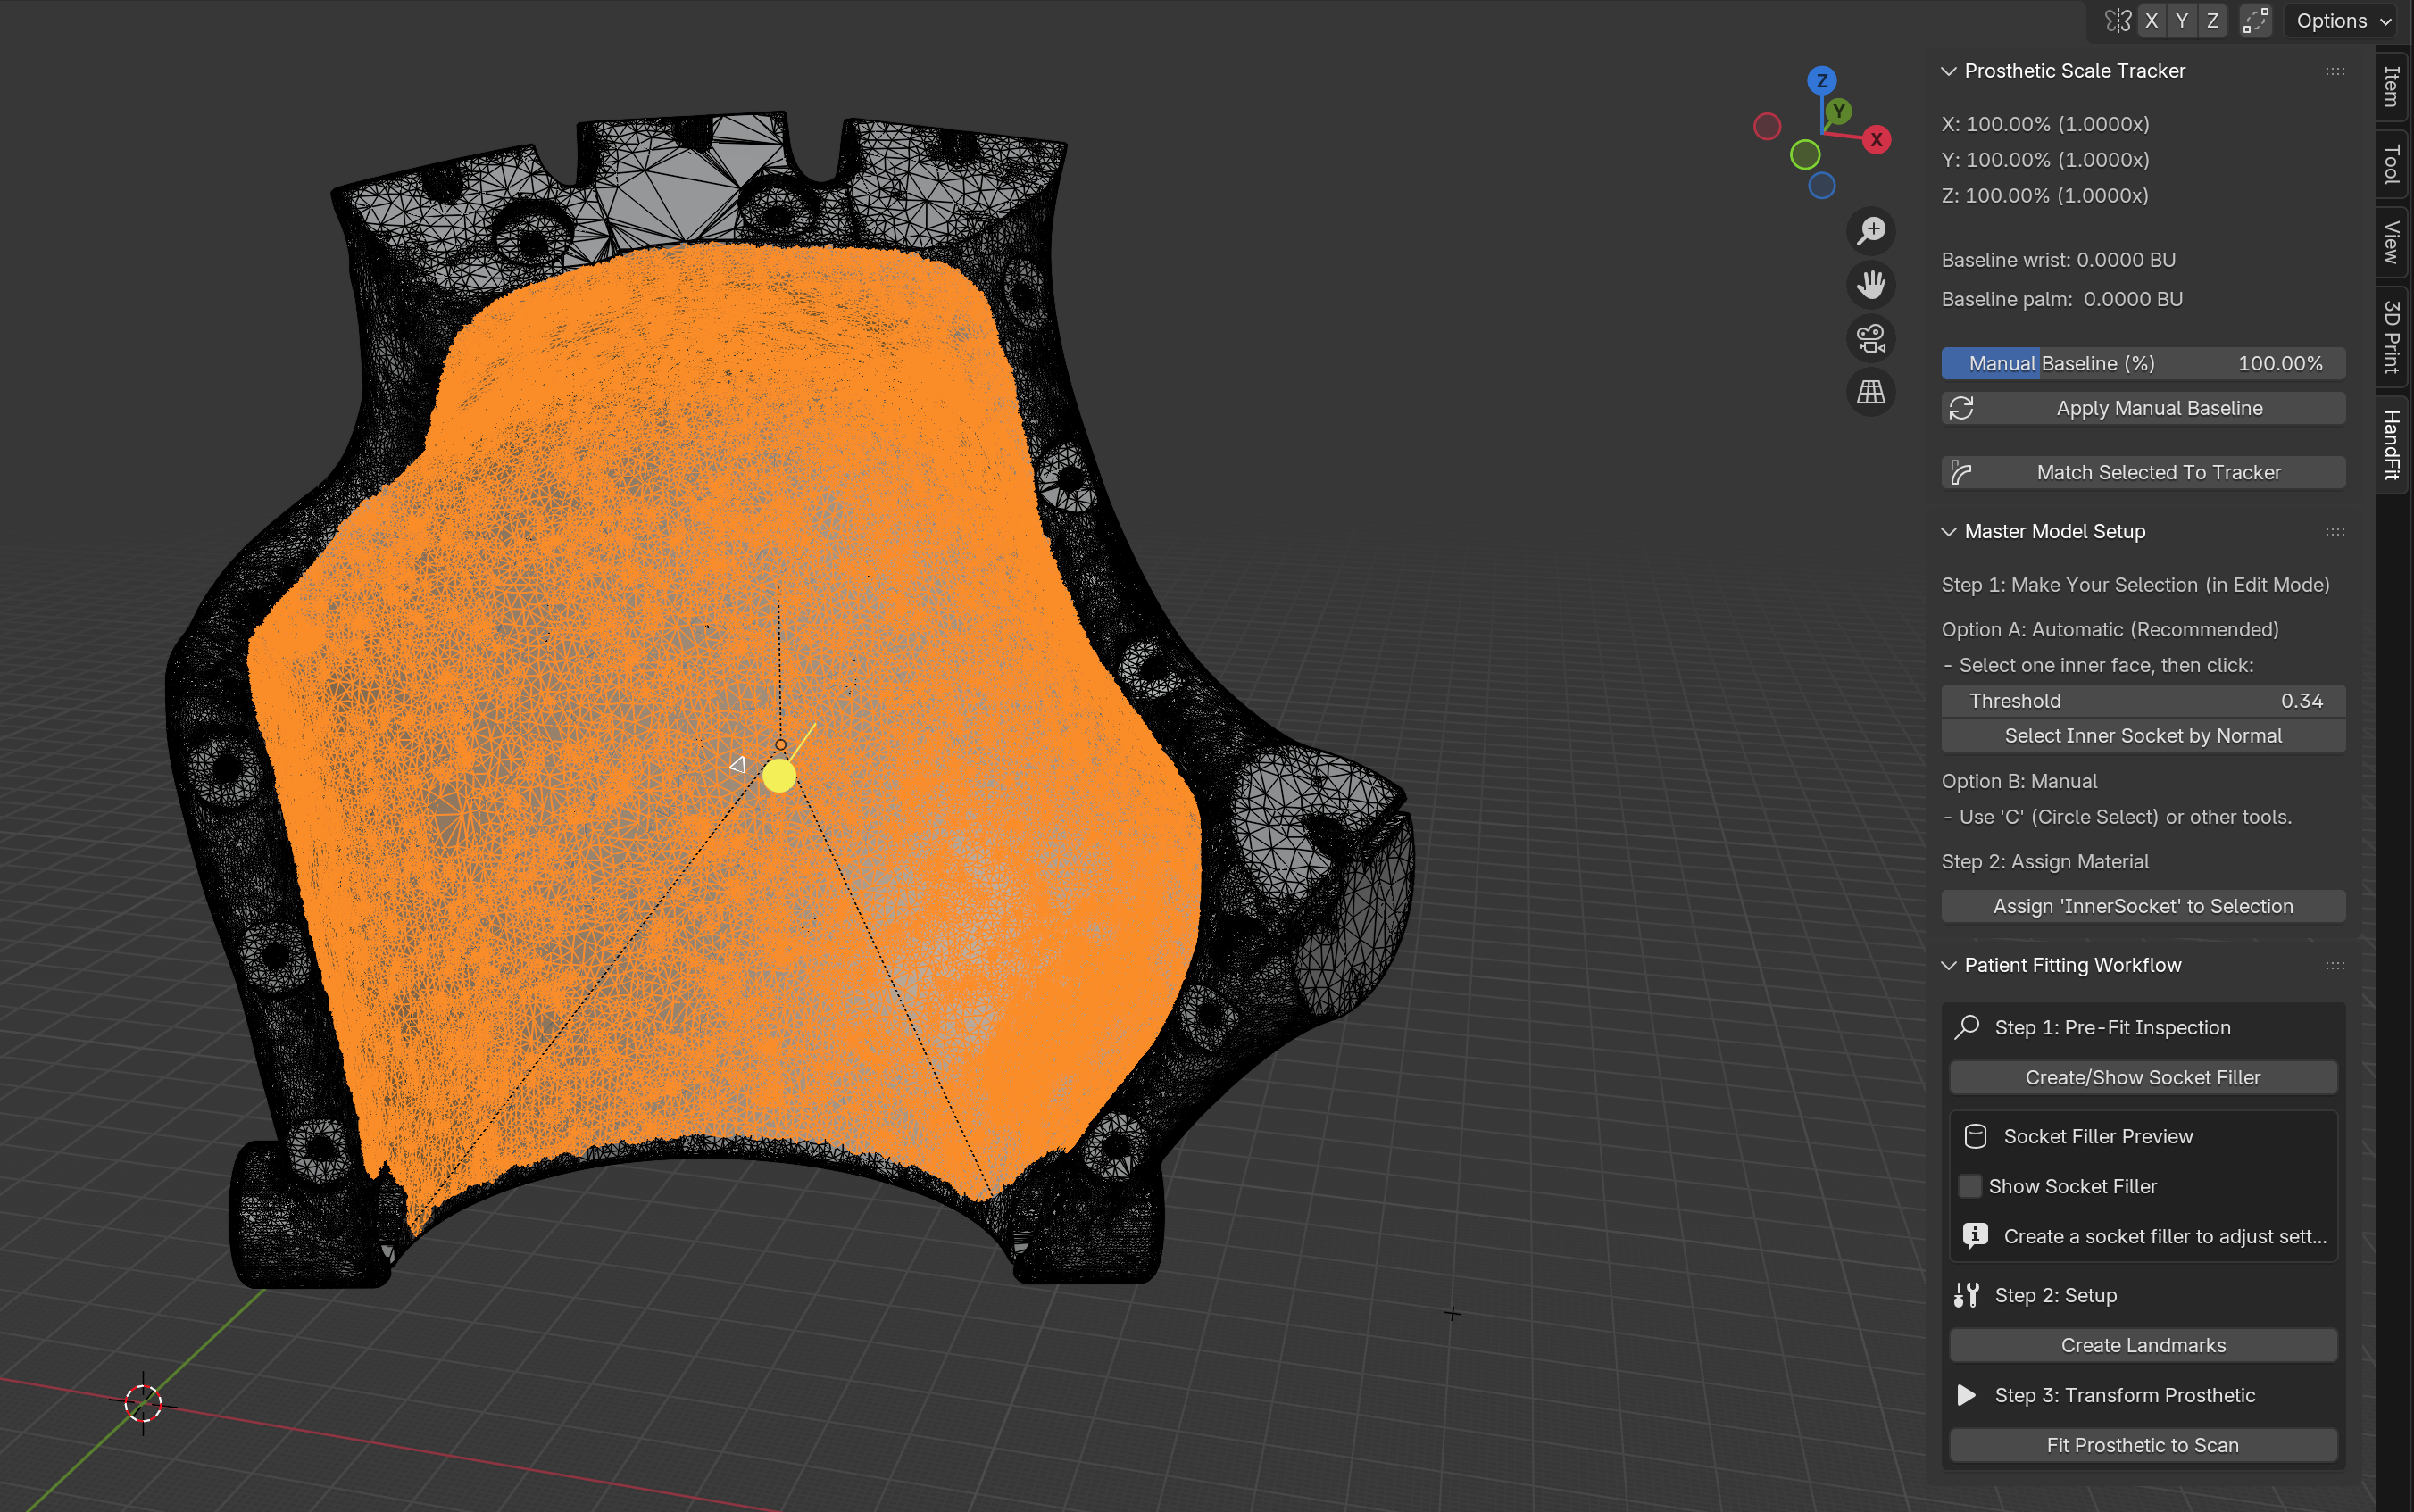
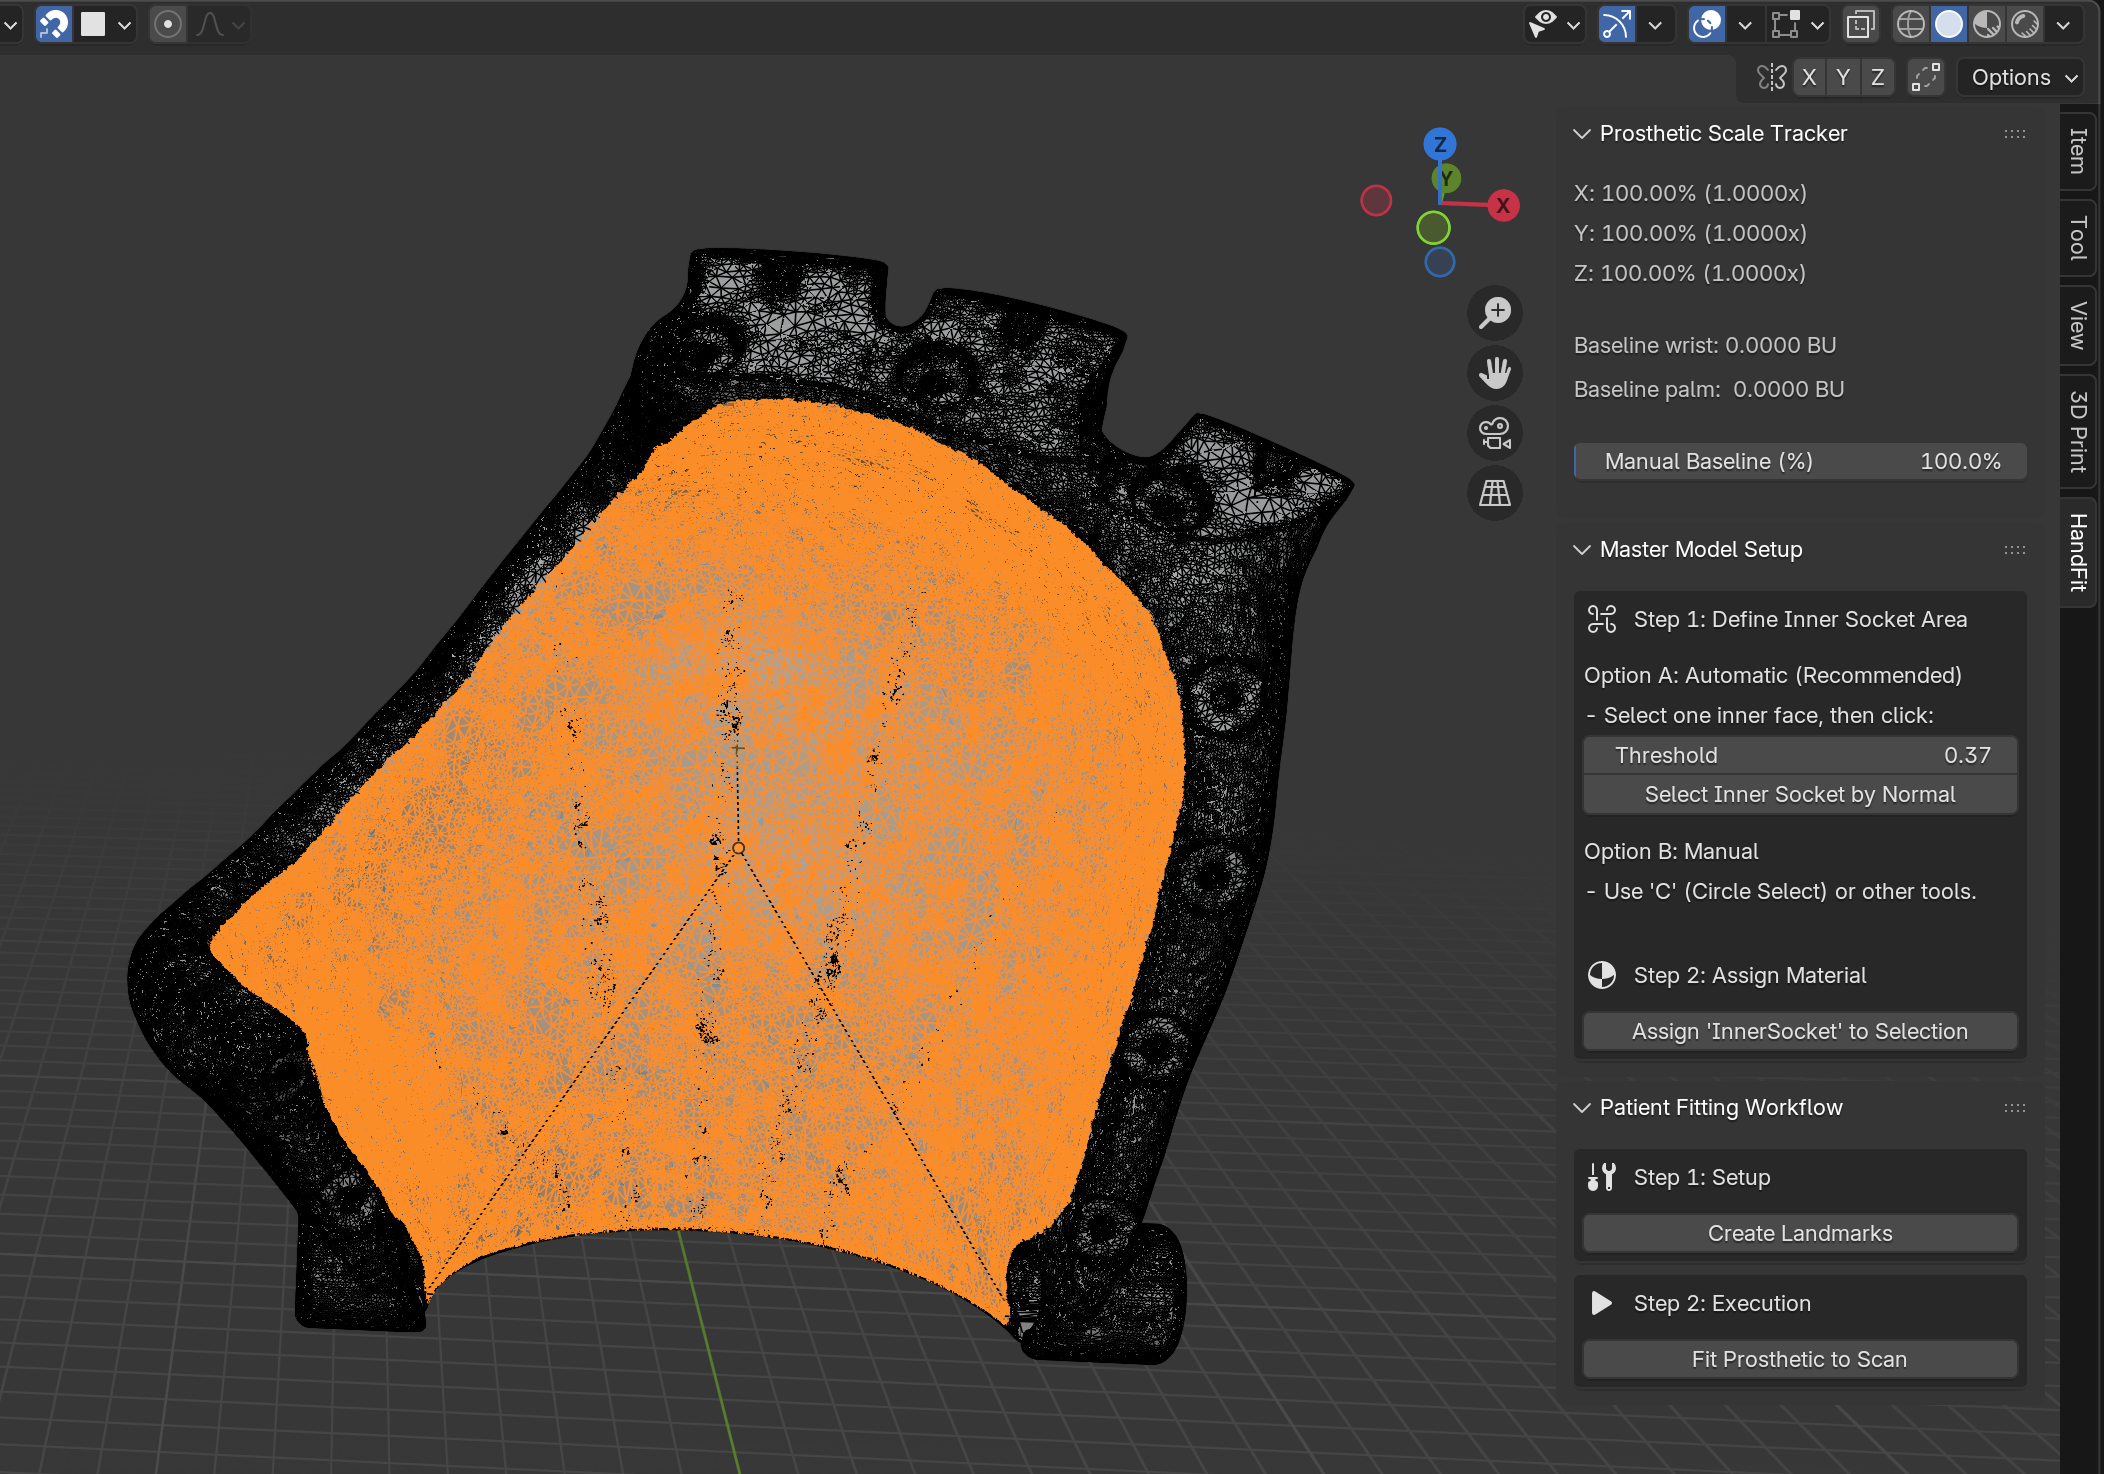
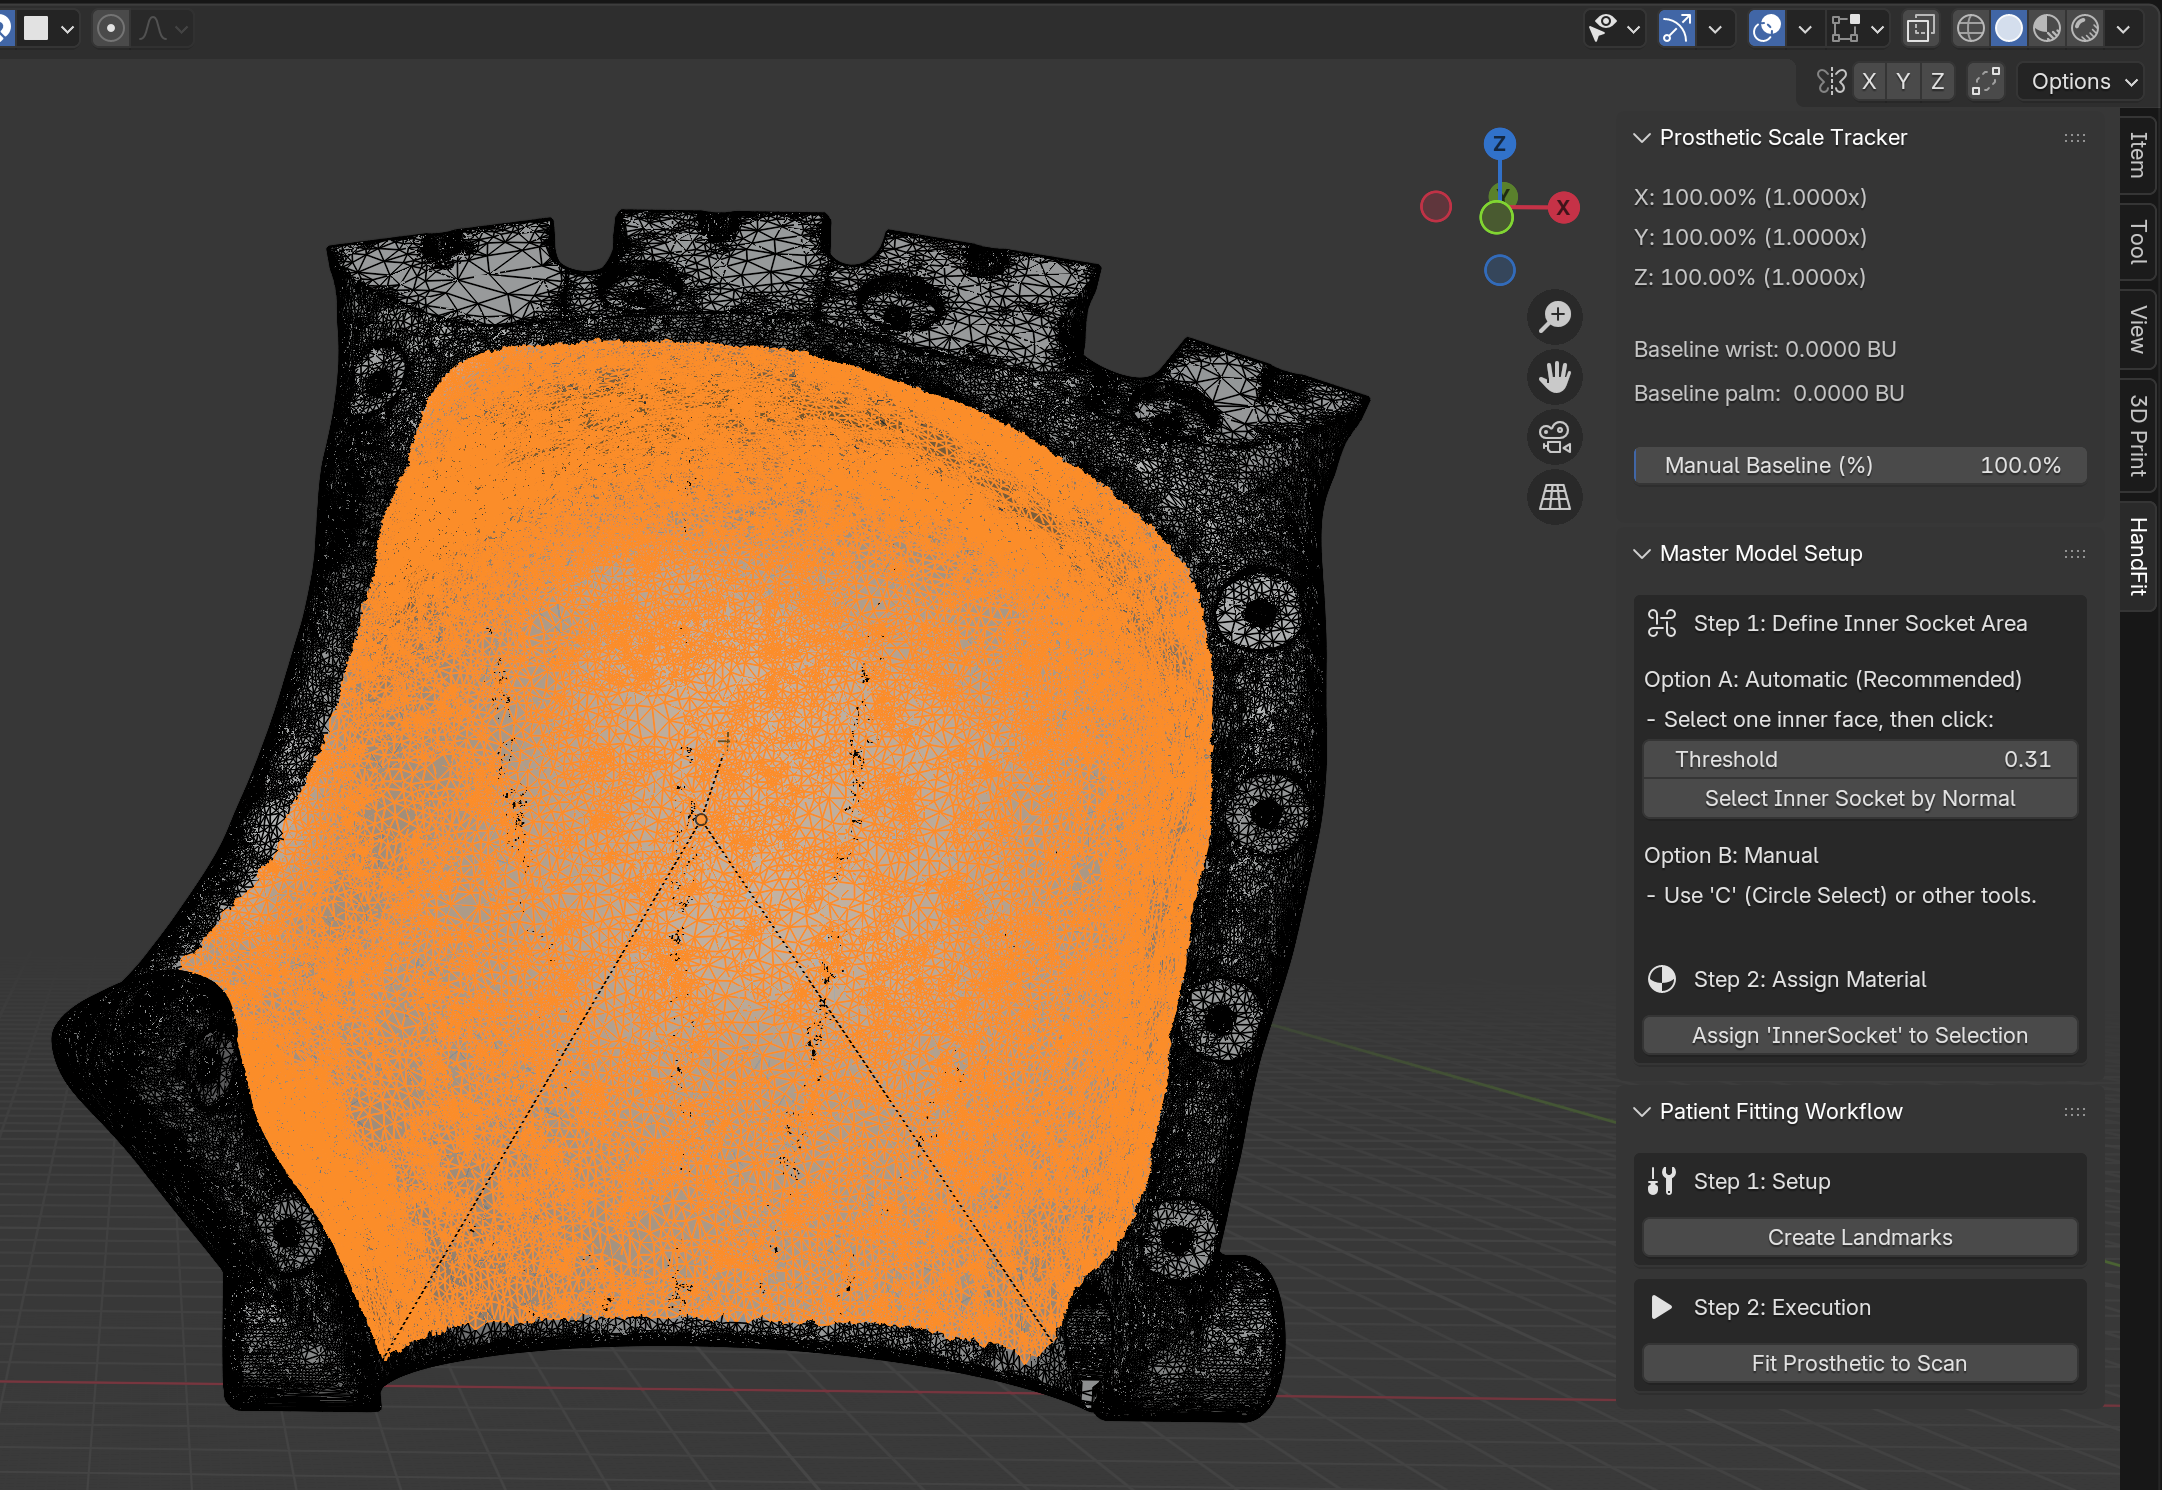
Import into Blender
Open Blender, import the hand scan (.stl) and load the appropriate Master Model from the pre-configured library.
30 sec
3 
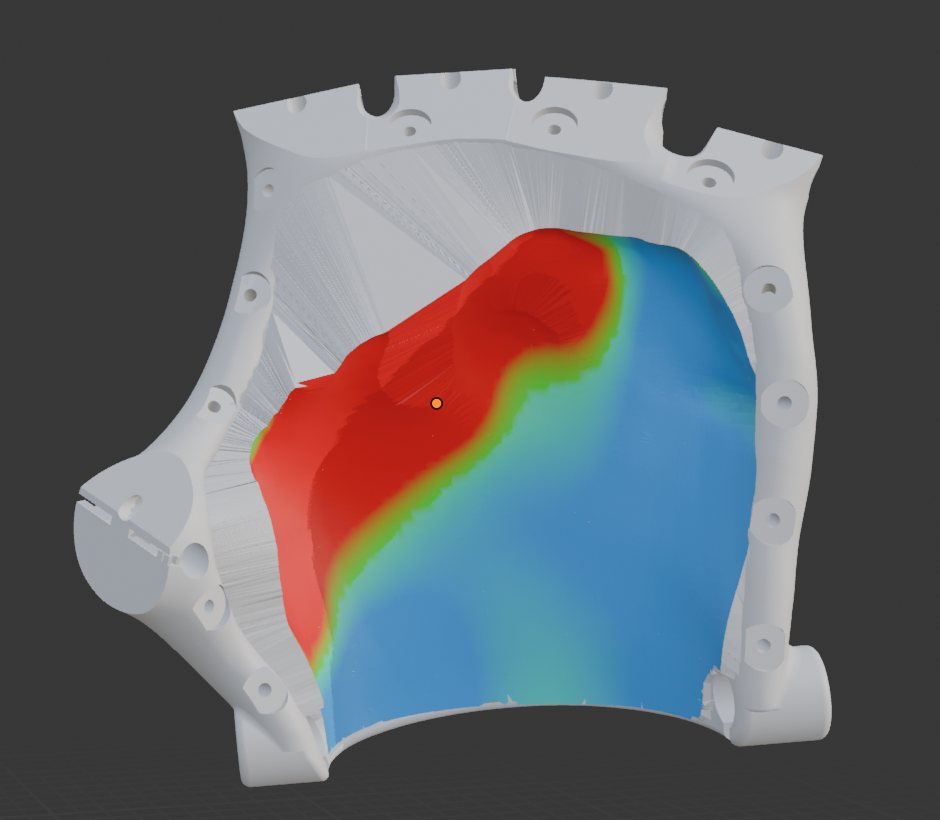
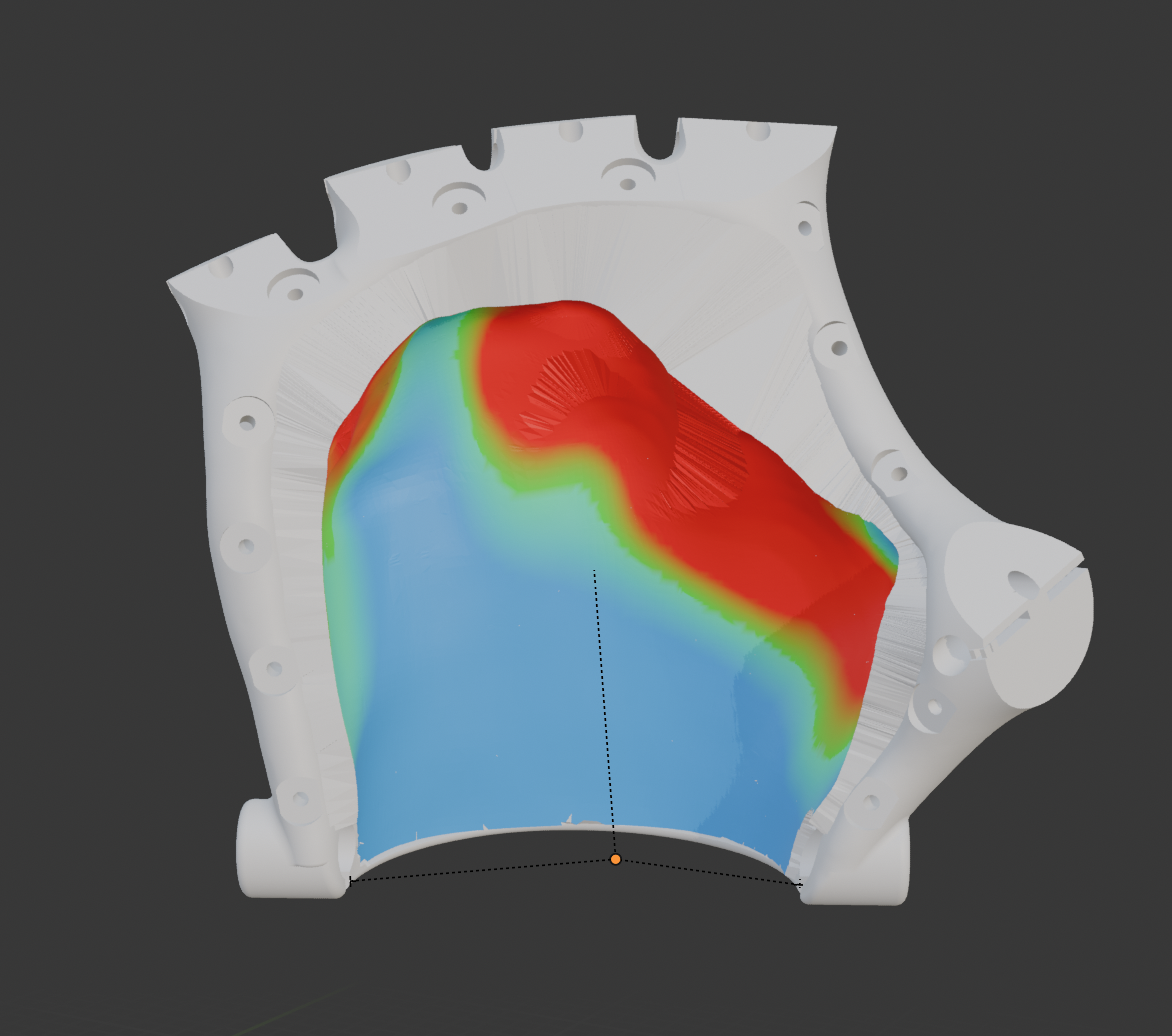
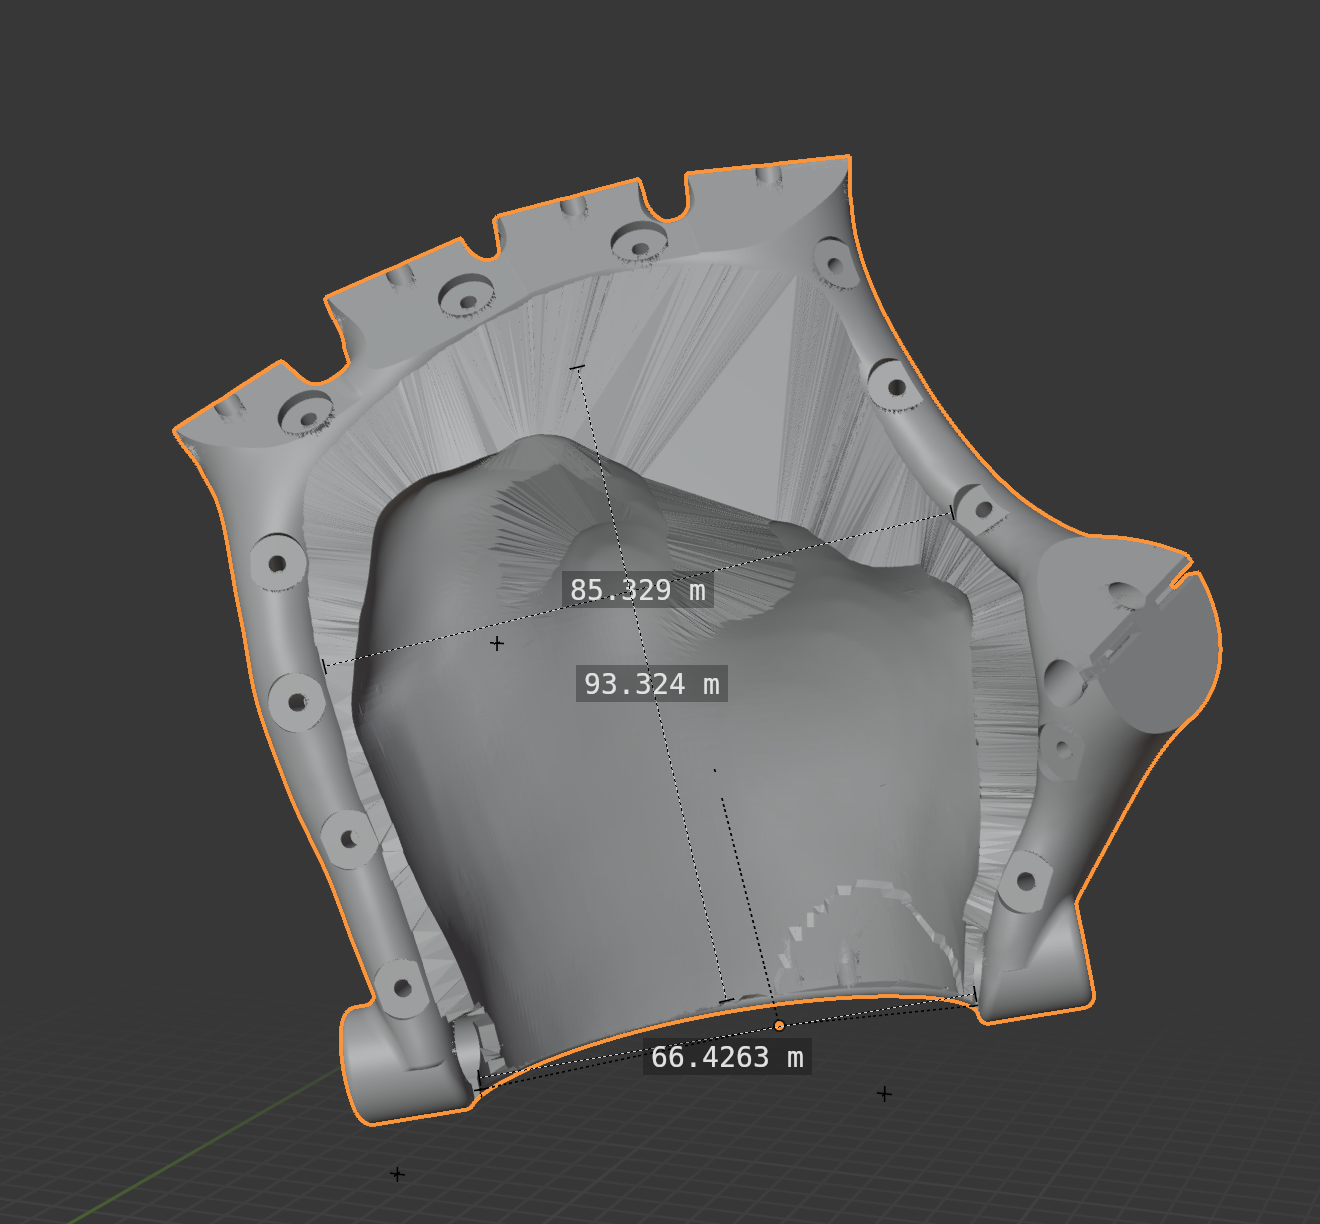
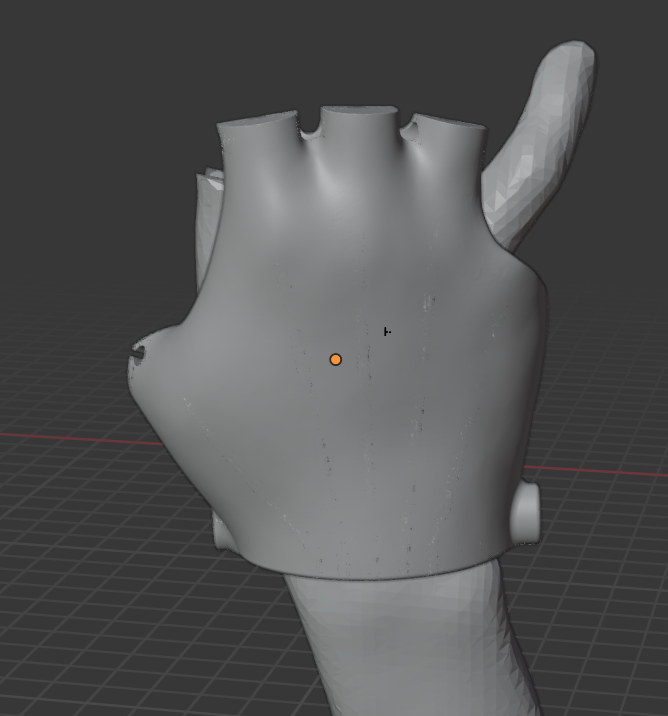
Place landmarks
Click "Create Landmarks" and position the three points: left wrist, right wrist, and palm center.
1 min
4 
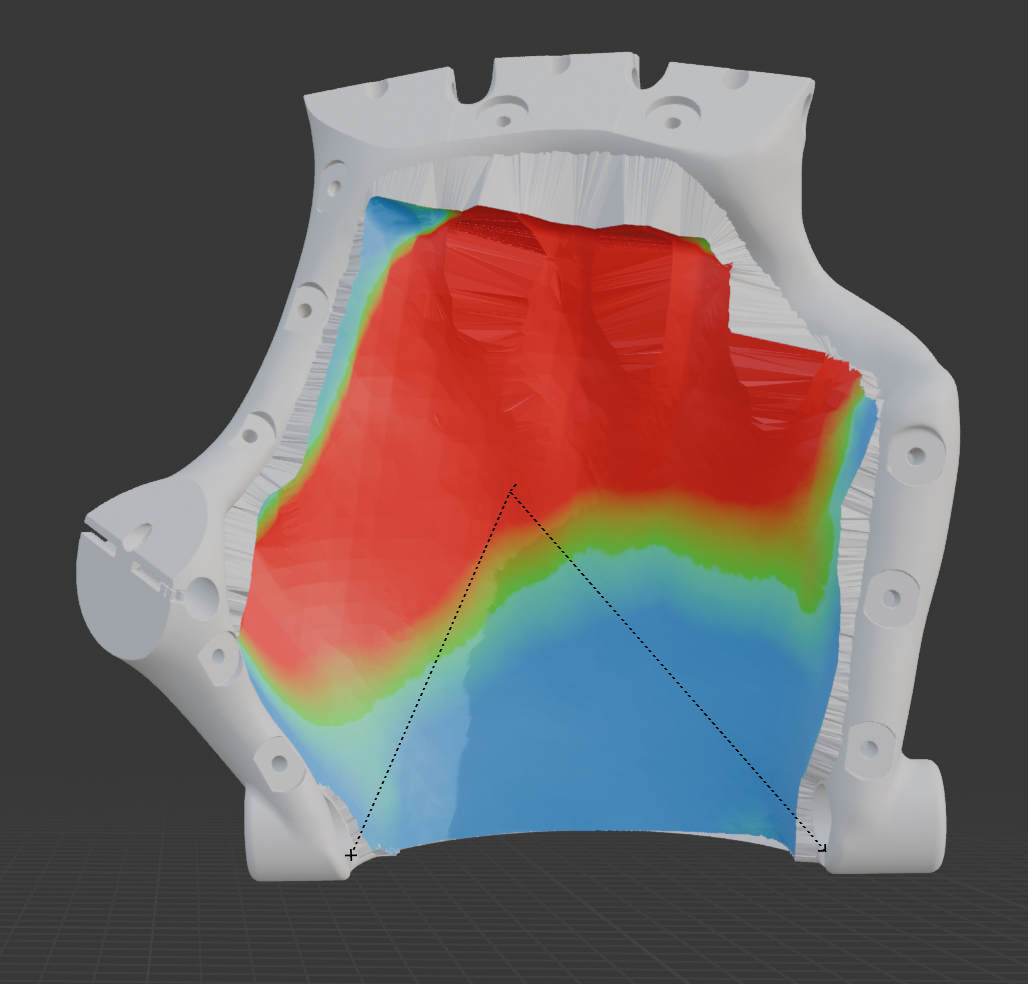
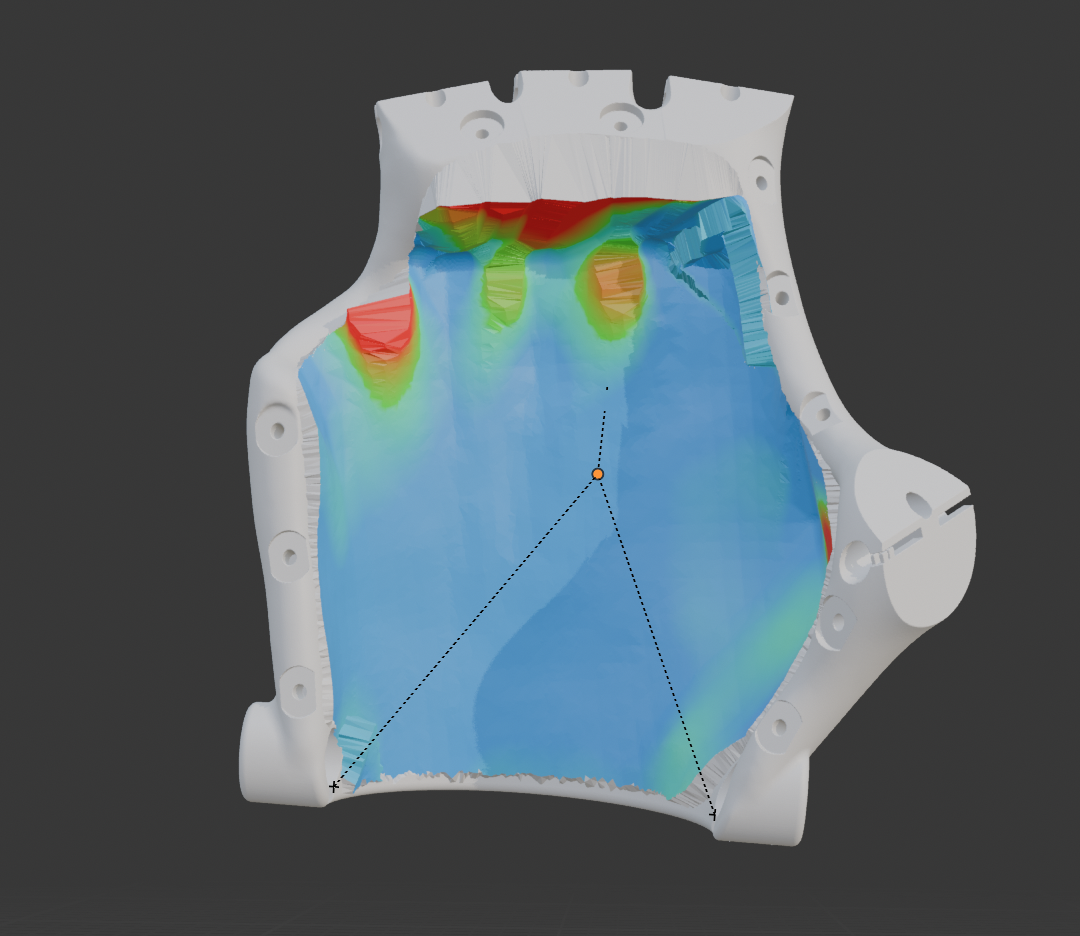
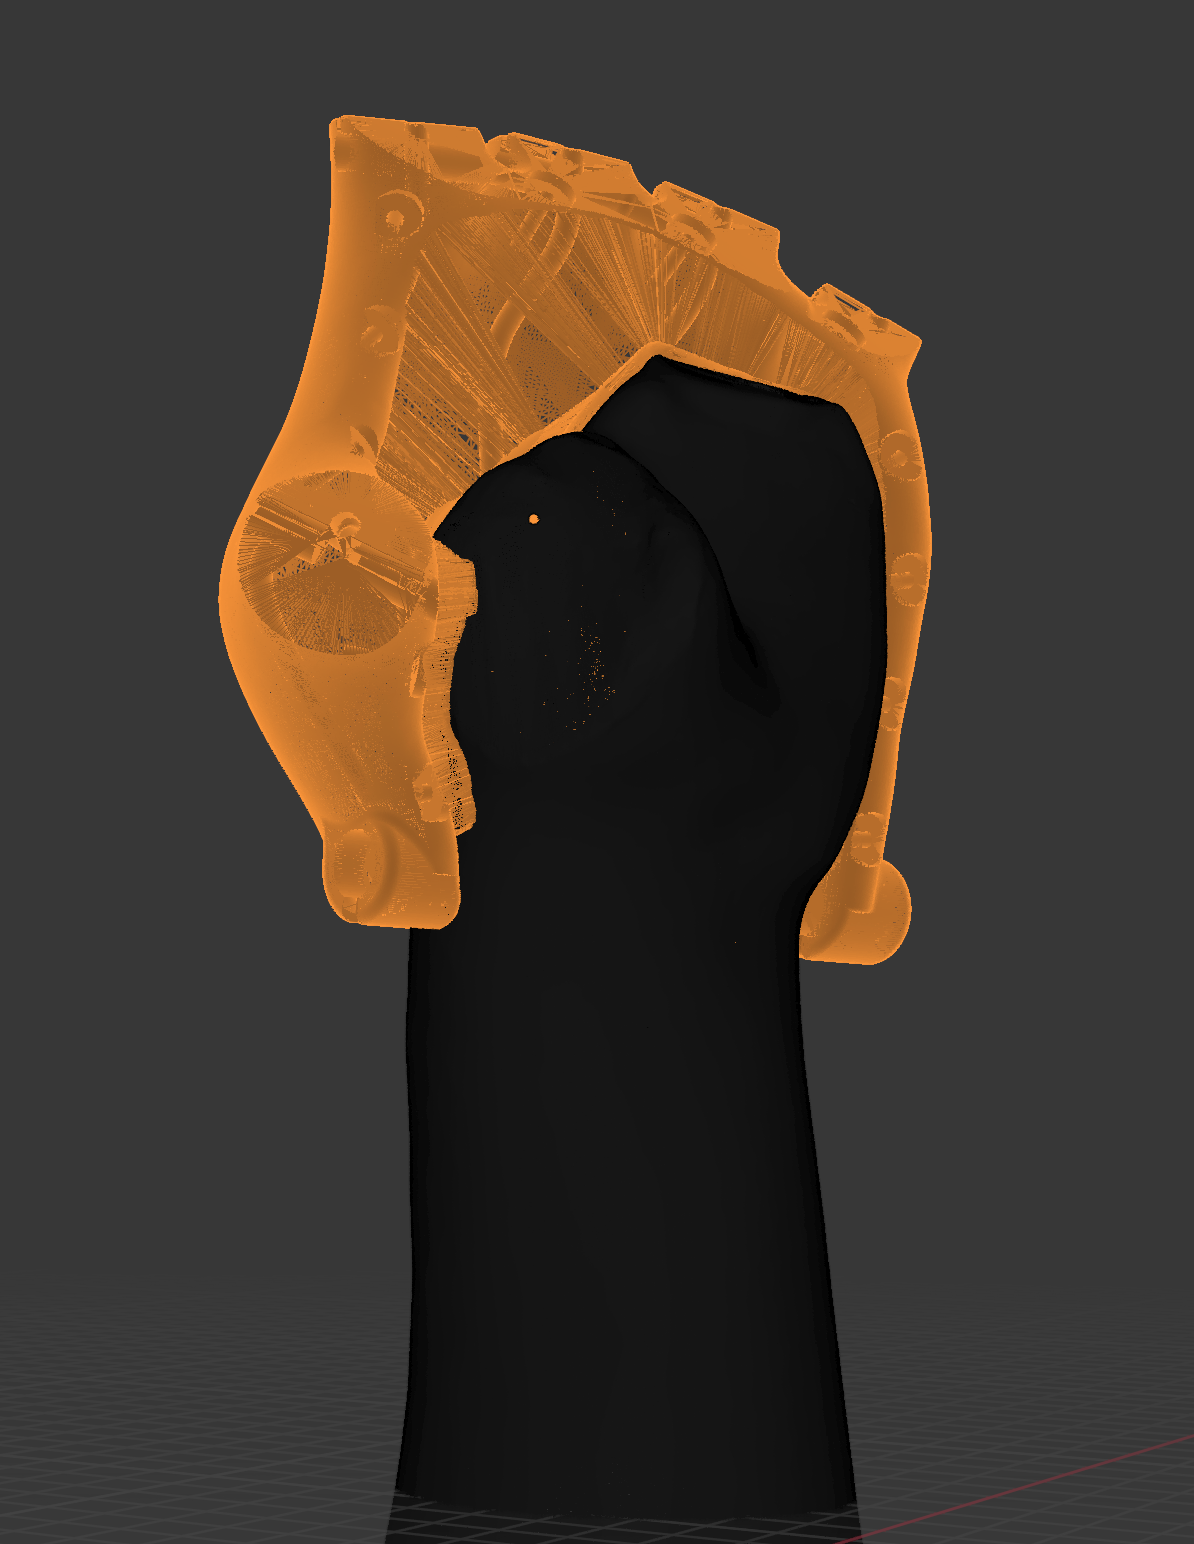
Click "Fit"
HandFit automatically aligns, scales, and conforms the socket. Adjust the offset slider if needed.
< 1 min
5 
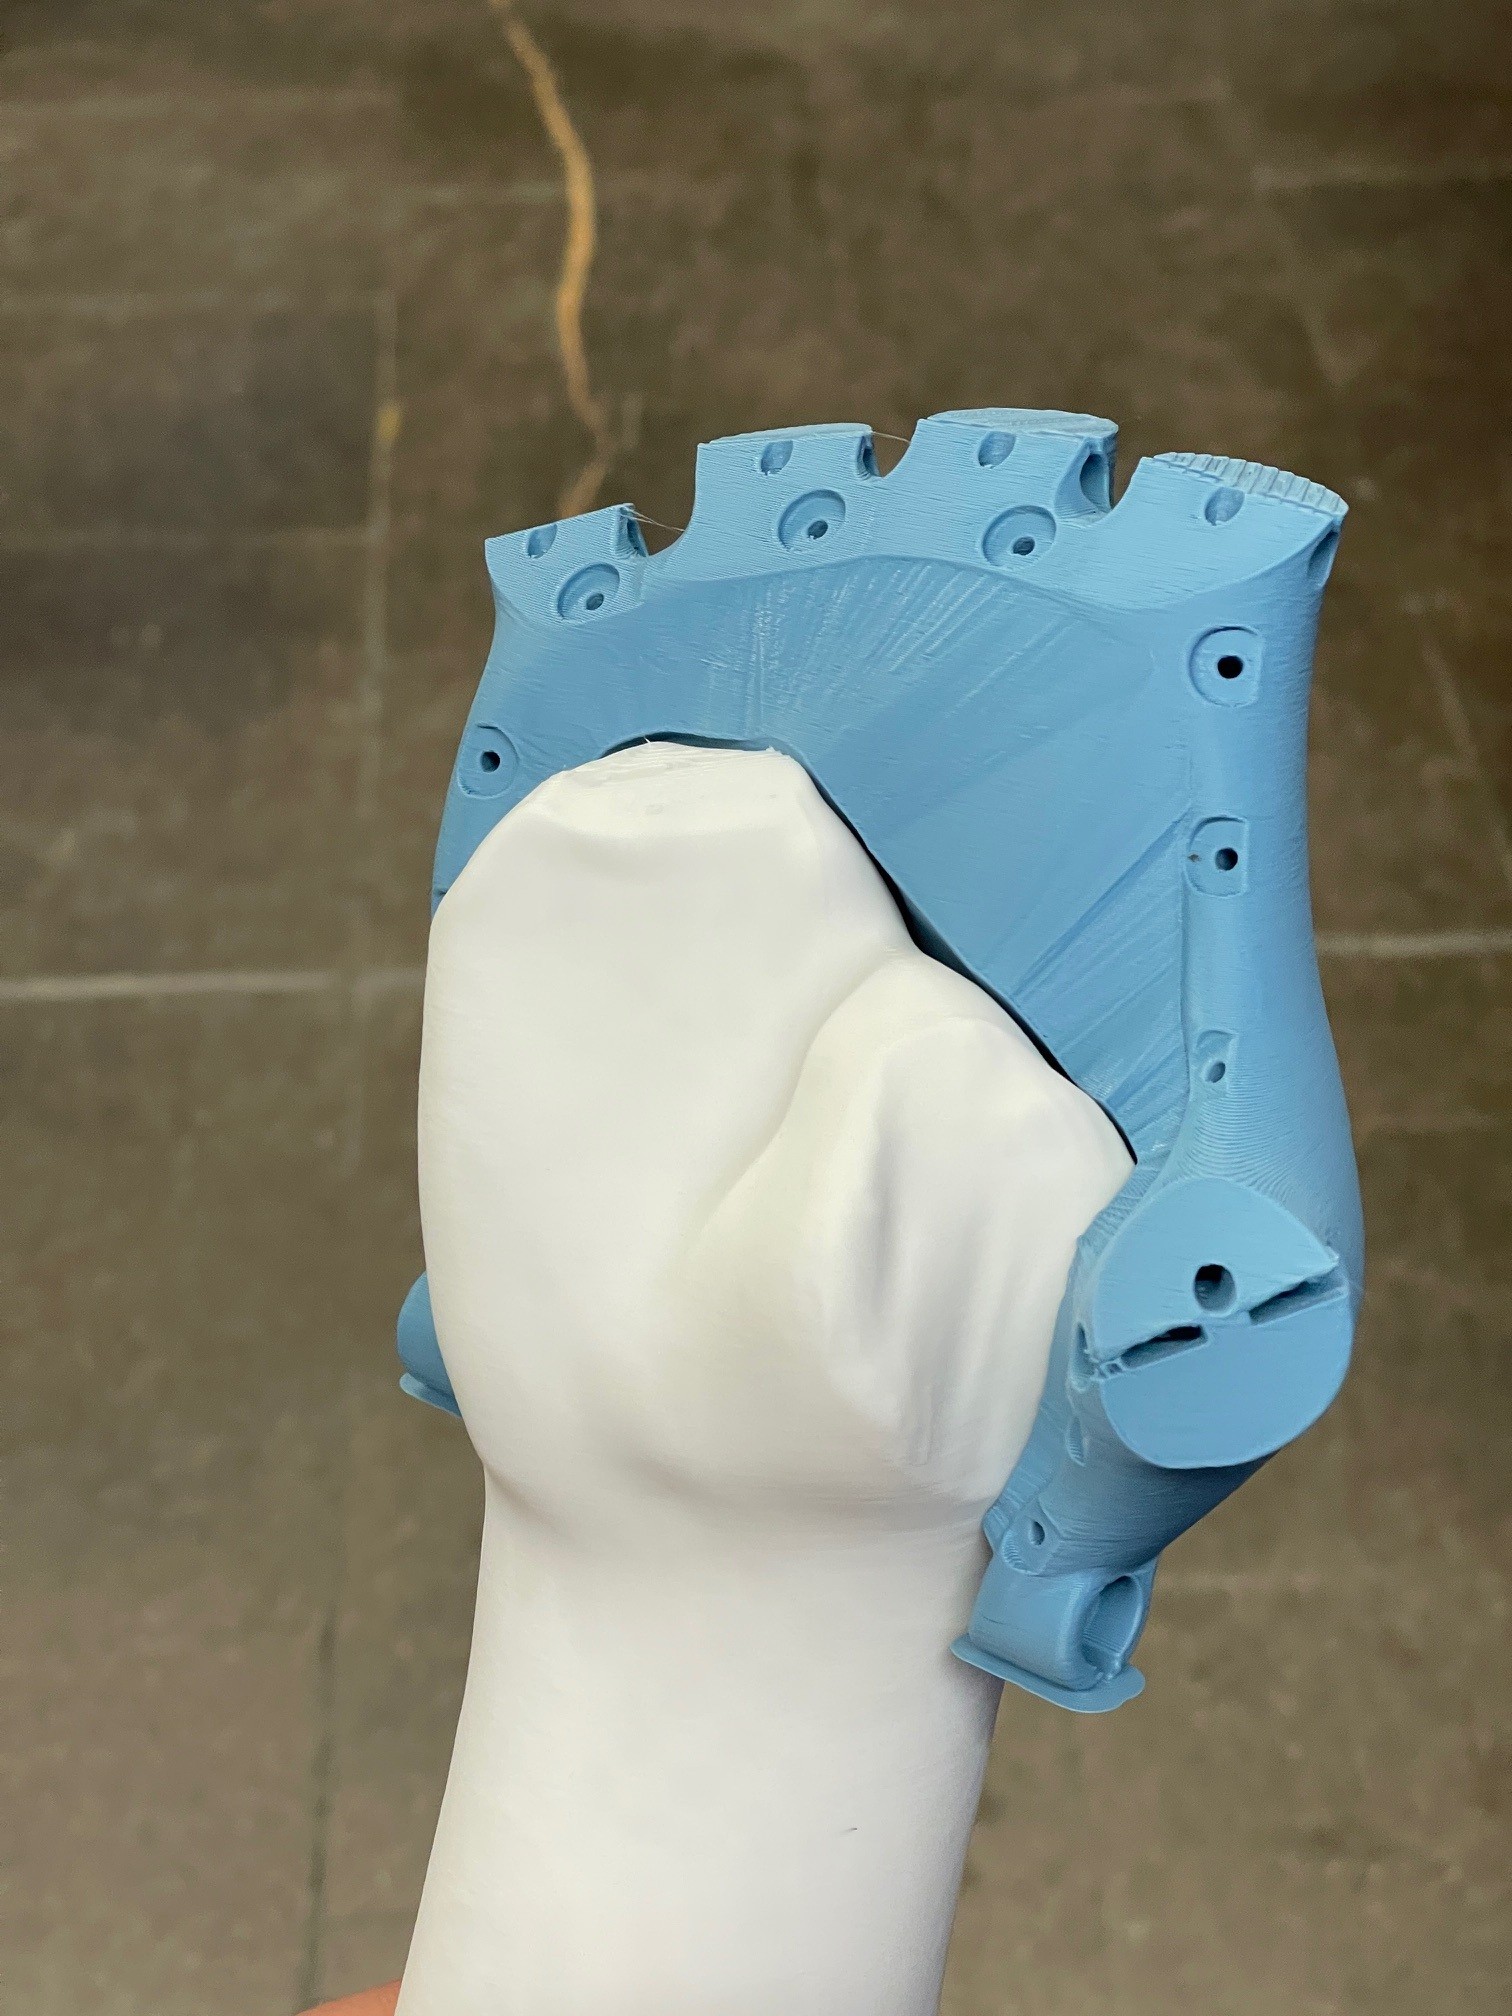
Export and print
Click "Apply and Finalize," then export as .stl. Load into your slicer and print.
30 sec

Total time: ~5 minutes (excluding print time)

Performance Comparison

Comparison between the traditional manual workflow (Free 3D Hands Guide) and the automated HandFit process.

Method Total Time* Software Time Required Expertise Repeatability
Manual CAD (Standard) 30-60 min 15-20 min High (CAD Skills) Low (User Varied)
Uniform Scaling 15-20 min 5-10 min Medium Medium
HandFit (Ours) ~2 min < 2 min Low (Few-Clicks) High (Algorithmic)

*Total time includes scanning, landmark placement, software fitting, and export. Print time excluded.

Results

We evaluated HandFit across all eight Kinetic Hand Master Model variants. The primary metric is Root Mean Square Error (RMSE) between the socket surface and the patient scan, measured before and after automated fitting with a target offset of 3.0mm for liner accommodation.

Master Model Variant RMSE Before (mm) RMSE After (mm) Improvement
Full Hand - Left 13.68 2.99 78.1%
Full Hand - Right 14.15 2.98 78.9%
Pinky - Left 11.47 3.00 73.8%
Pinky - Right 6.11 2.99 51.0%
Thumb/Index - Left 5.00 2.99 40.3%
Thumb/Index - Right 4.96 3.00 39.6%
Thumb - Left 7.81 2.99 61.7%
Thumb - Right 6.44 3.00 53.4%

Regardless of initial discrepancy (ranging from 4.96mm to 14.15mm), the fitted socket consistently converges to the target 3.0mm offset with sub-millimeter precision (±0.01mm). This ensures uniform liner accommodation and eliminates localized pressure points.

Socket Gap Visualization

The heat maps serve as a diagnostic of the initial fit quality. While blue zones imply an acceptable starting fit, the extensive red and yellow regions identify areas where the generic prosthetic was too loose. The HandFit algorithm corrects these deficiencies by extruding material to fill the gaps. Therefore, areas of high material addition (red) demonstrate where the customization process has provided the greatest benefit, transforming a loose, generic shell into a secure, user-specific socket.

Full Hand - Left

Full Hand - L

Full Hand - Right

Full Hand - R

Pinky - Left

Pinky - L

Pinky - Right

Pinky - R

Thumb/Index - Left

Thumb/Index - L

Thumb/Index - Right

Thumb/Index - R

Thumb - Left

Thumb - L

Thumb - Right

Thumb - R

0mm
2mm
5mm
8mm
>8mm
Excellent Fit
(Minimal Added)
Moderate Fit
(Acceptable)
Poor Fit
(Significant Gap)
Very Poor
(Extreme)

Master Model Setup

The Master Model Setup allows developers to onboard new prosthetic designs into the ecosystem. By defining the inner socket region once using our Geometric Normal Selection tool, the mesh is "tagged" for all future automated fittings.

Master Model UI

Master Models

Master Models were created for every variation of the Kinetic Hand template. Manually highlighting the inner socket region is often the most time-consuming step in prosthetic design, requiring precise 3D navigation skills that can be challenging for users without CAD experience.

To eliminate this technical barrier, we pre-processed the entire library. By defining the inner socket region once using our Geometric Normal Selection tool, the mesh is permanently "tagged" for all future uses. This removes the complexity of manual selection entirely, allowing non-technical users to simply load a model and proceed immediately to automated fitting.

Get the Library

All pre-tagged Master Models are open-source and free to download. Access the complete repository on Google Drive:

Download Master Models
Model Variation 1

Full Hand - Left

Model Variation 2

Full Hand - Right

Model Variation 3

Pinky - Left

Model Variation 4

Pinky - Right

Model Variation 5

Thumb/Index - Left

Model Variation 6

Thumb/Index - Right

Model Variation 7

Thumb - Left

Model Variation 8

Thumb - Right

System Requirements

Component Requirement Notes
Blender 4.2 or later Free download from blender.org
3D Scanning iOS device with TrueDepth camera We recommend EM3D; alternatives include Polycam or any app that exports .stl meshes
RAM 8 GB minimum, 16 GB recommended High-density scan meshes benefit from more memory
GPU Any OpenGL 4.3+ compatible Integrated graphics work; dedicated GPU improves viewport performance
3D Printer Any FDM printer Compatible with standard slicers (Cura, PrusaSlicer, etc.)


3D Print Ready

The finished prosthetic model is exported as a .stl file ready to be loaded in any 3D printer software for printing. This standard format ensures compatibility with all major slicing software (such as Cura or PrusaSlicer) and FDM printers, facilitating immediate local manufacturing.

Real 3D Printed Prosthetic Hand
(a) 3D Final assembled prosthetic.
Second Image Description
(b) Prosthetic inner socket with 3mm offset

Figure: The final 3D printed prosthetic socket produced from the HandFit output.

Interactive 3D Preview

BibTeX

@misc{handfit2025,
  title={HandFit: Automated Prosthetic Fitting Add-on for Blender}, 
  author={Marcos Costa, Alisa Rupenyan, Manuel Hitz},
  year={2025},
  institution={ZHAW School of Engineering},
}

Contact & Support

Questions, bug reports, or contributions? We'd love to hear from you.

Want to contribute a new Master Model for a different prosthetic design? Submit a pull request or reach out directly.